Square Face Makeup: Contour, Blush & Brows That Flatter
Square face makeup done right: where to contour, how to place blush, the brow shapes that soften angles - and a free AI face-shape check to confirm yours first.

Estimated reading time: 13 min
Key Takeaways
Free tools for this guide (run in your browser, nothing uploaded):
- Face shape detector
- Free AI makeup analysis (undertone, face shape, colour season)
- Virtual makeup try-on (26 looks, free)
- Learn how to determine your face shape for tailored makeup routines.
- Discover specific makeup techniques for square, round, oval, and heart-shaped faces.
- Master contour, blush, highlight, eye, brow, and lip placement by face shape.
- Get a step-by-step guide to makeup for a square face and understand why each step matters.
- See how AI-powered tools like Makeup Check AI can personalize your beauty routine in minutes.
Table of Contents
- Section 1: How to Determine Your Face Shape
- Section 2: Why Face Shape Matters in Makeup
- Section 3: Contour, Highlight, and Blush Placement by Face Shape
- Section 4: Brows, Eyes, and Lips—Tailoring Features to Face Shape
- Section 5: Makeup for a Square Face—Step-by-Step Guide
- Section 6: Natural vs. Sculpted Looks & Modern Techniques
- Conclusion
- FAQ
Section 1: How to Determine Your Face Shape
Why Face Shape Is the Foundation of Your Makeup Routine
Before you apply a single brushstroke, knowing your face shape is crucial. The right techniques for contouring, blush, brow shaping, or even choosing a lipstick shade depend on your facial structure. This section breaks down the key differences between square, round, oval, and heart-shaped faces—and how to identify yours. Understanding your face shape is the first step to unlocking makeup looks that elevate your natural features, so investing a few minutes to analyze your structure pays off every time you reach for a brush or palette. For a comprehensive approach, see our Makeup for Your Face Shape: The Complete Guide to Flattering Contour, Blush & Brows.
How to Measure and Analyze Your Face
- Forehead Width: Measure the distance across the widest part of your forehead. Place a flexible measuring tape just above the eyebrows and stretch it from one side of the hairline to the other. Typical ranges are 12–15 cm for most adults, but relative proportions matter more than the number.
- Cheekbone Width: Locate the tops of your cheekbones (just below the outer corners of your eyes) and measure across. Cheekbone width is often the broadest for heart-shaped and oval faces, and slightly less so for square or round shapes.
- Jawline Width: Measure from the tip of your jaw (below the ear) to the other side. For precision, place the tape at the angle where your jaw curves upward below the ear, and follow along the edge to the tip of your chin, then double the measurement for both sides. This can help you see if your jaw is the widest part of your face (typical for square faces).
- Face Length: Measure from the hairline at the top of your forehead straight down to your chin. This tells you how long your face is compared to its width.
Compare these measurements:
- If the width of your forehead, cheekbones, and jawline are similar and the jaw is angular, you likely have a square face. Square faces are characterized by a broad forehead and jawline of nearly equal width, with minimal curve at the chin. Think Olivia Wilde, Angelina Jolie, or Brad Pitt.
- If your face is almost as wide as it is long, with soft, rounded edges and minimal angles, you probably have a round face. The cheeks are usually the widest part, with a rounded chin and hairline—examples include Selena Gomez or Chrissy Teigen.
- If your face is longer than it is wide, with gently curved jaw and forehead, it’s likely oval. This is considered the most "balanced" face shape, with no single feature dominating. Beyoncé and Jessica Alba are classic examples.
- If your forehead is the widest part and your chin is pointed, you may have a heart-shaped face. The jaw is narrow and the cheeks taper down, with a widow’s peak or strong hairline sometimes present. Reese Witherspoon and Ryan Gosling have this face shape.
To further confirm your face shape, try tracing your reflection in a mirror with a washable marker or lipstick. Look at the outline: is it square, round, oval, or heart-shaped?
AI Tools for Fast, Accurate Face Shape Analysis
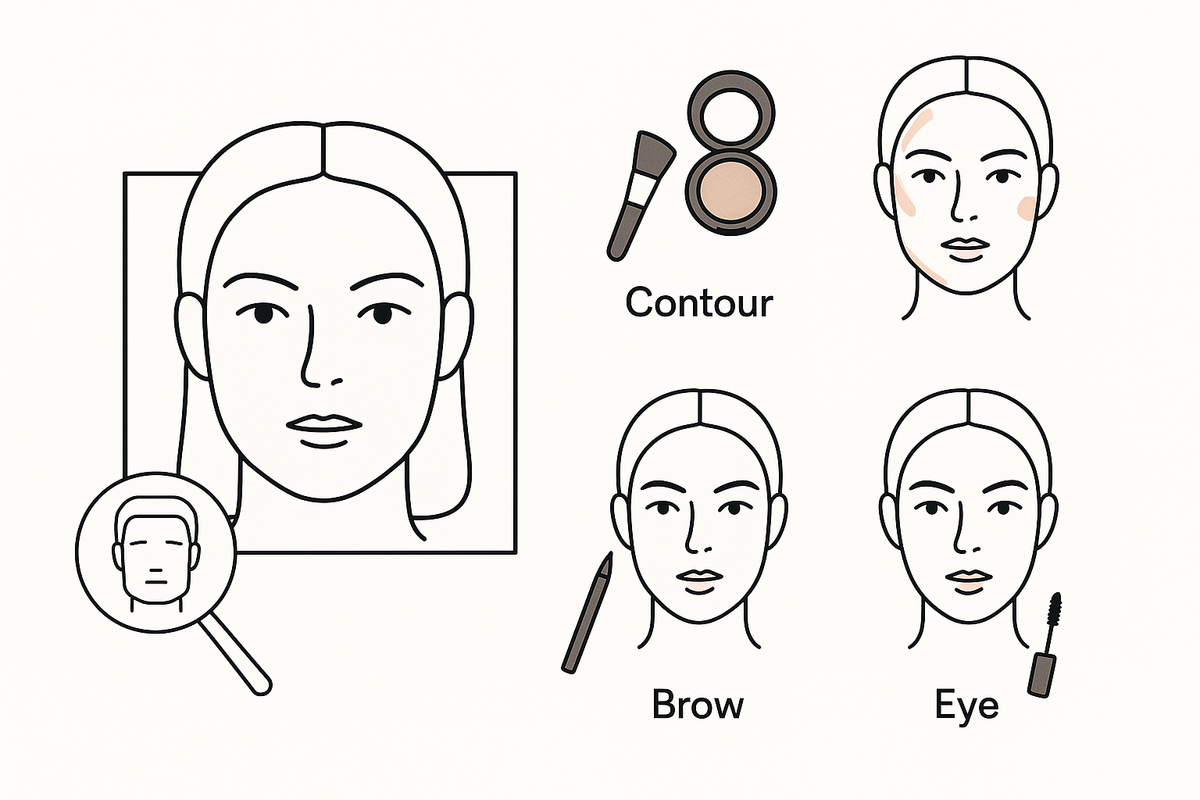
For a more precise and effortless analysis, apps like Makeup Check AI scan your features and instantly tell you your face shape, complete with a detailed breakdown and personalized makeup suggestions. This saves trial and error and sets you up for makeup success from the start. The app uses facial mapping algorithms that pinpoint landmarks (like your cheekbone apex and jaw corners) and compares your proportions to a database of face shapes. Within seconds, you’ll get a result such as "Square Face: 98% match" with diagrams and suggested makeup placements. This digital approach is especially helpful if your features seem between two shapes, ensuring you never second-guess your routine again.

Section 2: Why Face Shape Matters in Makeup
The Purpose of Face-Specific Makeup Techniques
Makeup isn’t one-size-fits-all. The goal is to enhance your natural beauty by balancing proportions, highlighting your best features, and creating harmony. Each face shape benefits from unique product placements and shading techniques:
- Square faces: Soften strong angles and draw attention away from a broad jawline. For example, a square face may have a 15 cm forehead, 14 cm cheekbones, and 15 cm jawline—all within 1–2 cm of each other. The makeup goal is to create the illusion of a more oval outline by subtly "rounding off" these corners.
- Round faces: Add definition and elongate the face. If your cheekbones measure 16 cm but your face length is only 17 cm, your face is almost as wide as it is long, so makeup placement should add verticality.
- Oval faces: Accentuate natural symmetry, tweak features for balance. Since no one area dominates, makeup can be used to enhance features without major reshaping.
- Heart-shaped faces: Balance a wide forehead and a pointed chin. Here, strategic contouring along the forehead and highlighting the chin help even out proportions.
How Structure Impacts Application
Every major feature—cheekbones, forehead, jawline, and chin—changes the way you approach contour, highlight, and blush. For example, contouring high on the cheeks can lift a round face, while blending along the jawline can soften a square face. A square face might use a darker contour shade just under the cheekbone and jaw corners to create softness, while a heart-shaped face requires more attention at the sides of the forehead and a touch under the chin to reduce the pointed effect. Even the way you apply blush changes: on a round face, apply it diagonally to create length, while on a square face, blend upward to avoid emphasizing the width. Understanding these nuances ensures that your makeup flatters, rather than fights, your natural shape.
Personalization With AI and Technology
Modern technology takes the guesswork out of makeup for every face shape. AI-powered apps provide custom face maps, product suggestions, and even video analysis for your exact structure. Upload a selfie or short video, and the software instantly generates a step-by-step guide: “Apply contour here, highlight here, blend blush in this direction.” Some platforms let you virtually try on different looks, comparing before-and-after images side by side. For more on how smart technology can revolutionize your routine, read Makeup AI: Revolutionizing Beauty with Personalized Technology. This new wave of personalization makes it easier than ever to master techniques once reserved for professional makeup artists.
Section 3: Contour, Highlight, and Blush Placement by Face Shape
Contour Placement: Softening, Sculpting, and Balancing
- Square Face: Focus contour on the outer corners of the forehead, temples, under cheekbones (angled toward the mouth but stopping mid-cheek), and jawline corners. Blend well to avoid harsh lines, aiming to visually "round off" angular features. For example, use a medium-matte contour stick: start at the hairline above your temples, sweep downward toward the outer brow, then follow under the cheekbone from the ear toward the mouth (stopping mid-cheek), and finally, trace along the jaw’s corners—this creates the illusion of a softer jaw and less broad forehead.
- Round Face: Place contour slightly higher on the cheeks and sweep toward the temples, with minimal jawline contouring. Imagine drawing a diagonal line from the top of your ear toward the corner of your mouth, but only blending halfway—this helps create cheekbone definition and lifts the face visually.
- Oval Face: Use subtle contour along cheekbones and a light touch on the sides of the forehead. Since the face is already balanced, less is more—just a whisper of shadow under the cheekbones and temples enhances natural structure.
- Heart-Shaped Face: Focus on the sides of the forehead and under cheekbones, with a hint under the chin to soften its point. This technique narrows the upper face and reduces the sharpness of the chin, creating an even silhouette.
Highlight Placement: Accentuating Structure
- Square Face: Apply highlighter to the center of the forehead, upper cheekbones, bridge of the nose, and center of the chin. This draws light to the center and softens the outline. For added dimension, tap a small amount above the brows and on the cupid’s bow.
- Round Face: Highlight the top of the cheekbones and the bridge of the nose to lift and elongate. Add a touch to the brow bone for extra lift.
- Oval Face: Focus on cheekbones and brow bones for a natural glow. Dab lightly—too much highlight can overwhelm an already balanced face.
- Heart-Shaped Face: Highlight the forehead, upper cheekbones, and chin to even proportions. A subtle highlight on the tip of the chin helps balance a narrower jaw.
Blush Placement: Adding Color Without Distortion
- Square Face: Sweep blush slightly under the cheekbone or blend upward toward the temples—avoid going too far out to the sides to prevent widening the face. Cream blushes are ideal for seamless blending. Start mid-cheek, blend upward, and avoid the apples of the cheeks to keep focus away from the jawline.
- Round Face: Apply blush higher on the cheekbones and blend diagonally upward. This technique visually lifts the face and gives definition. Avoid circular motions on the apples, which can exaggerate roundness.
- Oval Face: Center blush on the apples of the cheeks, blending outward for a natural look. This flatters the already harmonious proportions.
- Heart-Shaped Face: Place blush below the apples, blending toward the ears. This balances wide cheekbones and a pointed chin, keeping the face in proportion.
For more blush techniques by face shape, see Makeup Check AI’s tutorials or explore the AI Makeup Tutorial: Your Guide to Smart Beauty Routines.
Section 4: Brows, Eyes, and Lips—Tailoring Features to Face Shape
Brow Shape for Your Face
- Square Face: Opt for soft, rounded, or gently arched brows to counteract angularity. Avoid sharp, flat brows, which can exaggerate squareness. For example, if your jaw is strong, a brow with a moderate arch (around 2–3 mm above the brow bone’s highest point) will draw the eye upward and soften the overall effect. Use a brow pencil or powder to fill in sparse areas and a spoolie to blend for a natural finish.
- Round Face: Try a high, defined arch to elongate the face. A higher peak creates verticality—aim for a gradual ascent rather than a sharp, angular arch.
- Oval Face: Softly arched brows enhance symmetry. Keep the arch subtle and the overall brow shape natural, following your bone structure for the most flattering look.
- Heart-Shaped Face: Rounded or soft arches balance a pointed chin. Avoid overly thin or flat brows—fuller, gently curved brows work best to complement a wider forehead and narrow jaw.
Eye Makeup for Balance and Emphasis
- Square Face: Smoky eyes, winged liner, and outer-corner shadow help balance a strong jawline. Blending out and up visually lifts the face. For instance, a classic smoky eye with shadow concentrated on the outer V, paired with a slightly upward wing, can shift attention from the jaw to the eyes. Avoid heavy lower-lid liner, which can drag features downward.
- Round Face: Cat-eye liner and upward-swept shadows elongate. Use lighter shades on the inner corners and deeper hues at the outer edges to create an almond shape. For detailed techniques, see our Eye Makeup for Your Eye Shape: Complete Guide to Flattering Looks.
- Oval Face: Most eye looks flatter; experiment with shape and placement. Try both soft and bold looks to see which enhance your features best.
- Heart-Shaped Face: Focus shadow on the outer corners to balance a wider forehead. Use shimmer or light color on the lid and deepen the crease at the outer third for balance.
Lip Color and Definition
- Square Face: Choose nude, soft pink, or gently defined lips to avoid drawing attention to the jaw. Overlining the cupid’s bow and blending edges softens the mouth shape. Matte and satin finishes tend to flatter; avoid sharply lined dark lips, which can emphasize angularity.
- Round Face: Slightly overline the top lip for balance. Glossy textures can add dimension and fullness, further elongating the face.
- Oval Face: Most lip shapes and colors suit well. Try experimenting with bold reds, deep berries, or nude glosses—your balanced proportions are forgiving to most trends.
- Heart-Shaped Face: Avoid sharply defined lips; opt for blotted or diffused edges. A soft ombré effect, where the color fades at the edges, can make lips look fuller without emphasizing the chin.
Explore more on how AR and AI can help you try on different looks virtually in AR Beauty Try On: The Future of Virtual Makeup and Skincare and our detailed Virtual Makeup Try On: Instantly Try Any Look with AI & AR Tools guide.
Section 5: Makeup for a Square Face—Step-by-Step Guide
Step 1: Prep and Prime
Begin with a clean, moisturized base. Use a gentle cleanser and follow with a hydrating toner or essence. Apply primer to smooth texture and ensure long-lasting wear—see Makeup Check AI’s answer to what are the best primers for makeup and foundation for tailored recommendations. For square faces, opt for a blurring primer around the jaw and forehead to diffuse angular lines, and a hydrating or illuminating primer in the center to boost radiance. Let primer set for 1–2 minutes before applying foundation. For a complete prep routine including exfoliating acids and skincare tips, check our primer makeup: Step-by-Step Prep for Flawless Skin guide.
Step 2: Foundation & Concealer
- Use a lightweight foundation that matches your skin tone. Apply with a damp sponge for a natural finish, starting at the center of the face and blending outward. Avoid heavy layers on the jaw and forehead, which can accentuate width.
- Apply concealer only where needed (under eyes, blemishes) to maintain a natural finish. For square faces, a touch of brightening concealer at the inner corners of the eyes and center of the forehead can help draw focus inward.
Step 3: Contouring for a Square Face
- Contour the corners of the forehead and along the jawline to soften angles. Use a cool-toned contour cream or powder (1–2 shades deeper than your skin tone). Start at the temples and sweep down to the outer brow, then trace along the jaw’s corners and blend toward the earlobe.
- Under cheekbones, blend contour from the ear toward the mouth, stopping halfway. Avoid bringing contour too close to the nose—it should fade out mid-cheek to keep the face looking lifted.
- Blend thoroughly to avoid harsh lines. Use a dense brush or damp sponge and blend upward in circular motions for a seamless effect.
Step 4: Highlighting
- Highlight the center of the forehead, bridge of the nose, upper cheekbones, and chin. Choose a natural, luminous highlighter—avoid chunky glitter for daytime.
- This draws the eye inward and balances the face’s outline. For extra lift, add a touch above the brow arch and at the cupid’s bow.
Step 5: Blush Placement
- Apply blush just under the cheekbone (not on the apples) and sweep upward toward the temples. Use a soft peach or rose shade for a healthy flush that doesn’t overpower the bone structure.
- Choose soft, natural shades that won’t widen the face. Avoid blush that extends past the outer corner of the eye, as this can make the face appear broader.
Step 6: Brows, Eyes, and Lips
- Shape brows with a gentle arch or soft curve. Use a brow pencil to define the arch subtly, then set with clear or tinted brow gel.
- Use smoky or winged eye looks to draw focus upward and outward. Start with a neutral base shadow, deepen the outer corners, and finish with a flick of liner angled toward the tail of the brow. Curl lashes and apply mascara, concentrating on the outer lashes for extra lift.
- Finish with a nude or pink lip, softly lined for balance. Blur the edges with a fingertip or brush for a diffused, natural effect. Top with a gloss if desired for extra volume and softness.
For a personalized routine with daily reminders and tailored tutorials, try Makeup Check AI, your complete AI beauty team.
Section 6: Natural vs. Sculpted Looks & Modern Techniques
Natural, "Clean-Girl" Makeup for Square Faces
The trend toward natural, "no-makeup" makeup has popularized sheer textures and subtle enhancements. For square faces, this means:
- Light, creamy contour products for soft definition. Choose cream bronzers or sticks that melt into the skin, and use fingers or a sponge for a barely-there finish.
- Minimal powder for a skin-like finish. Set only where necessary—typically the T-zone or under-eye area—to keep the skin looking fresh and prevent cakiness around angular features.
- Blush blended seamlessly upward, avoiding stripes. Cream blushes help achieve this effect, and a stippling brush can ensure no harsh edges remain.
Underpainting—applying contour and highlight under foundation—can create a barely-there effect while still shaping the face. This technique involves applying cream contour and highlight after primer but before foundation. Blend foundation on top for a soft, natural shadow that sculpts without obvious lines. It’s ideal for everyday wear and works especially well if you prefer lightweight makeup or want to avoid a "done" look.
Sculpted and Dramatic Looks
- Full contouring for red carpet or glam occasions. This means layering cream and powder contour for maximum definition, and using a damp sponge to sharpen lines under the cheekbone or jaw for extra drama.
- Layered cream and powder products for extra staying power. Start with creams for blendability and set with matching powder shades for all-day wear—great for events or photography.
- Defined brows and bold lips for a statement. Choose a rich brow gel and a classic red or berry lipstick, but remember to keep lip lines soft and blended to avoid emphasizing jaw width.
Balance is key: Even with a dramatic style, blend lines and soften transitions, especially around the jaw and temples, to avoid harshness. Use a clean brush or sponge to diffuse edges, and always check your makeup in natural light to ensure everything looks seamless.
AI and AR Tools for Experimentation
Modern apps allow you to try on both natural and bold looks in real time. Use AR try-on features or AI-generated tutorials to see what works best for your square face—and other shapes too. Upload a selfie, select a makeup style (from "clean girl" to "full glam"), and instantly preview how different blush placements, eye shapes, or lip colors flatter your unique structure. Some platforms even let you adjust features like contour intensity or brow thickness with a slider, so you can experiment risk-free. Dive deeper into smart beauty tech with AI Makeup App: The Ultimate Guide to Smarter Beauty Routines.
Conclusion
Mastering makeup for a square face starts with understanding your features and choosing techniques that enhance, rather than disguise, your unique beauty. Whether your face is square, round, oval, or heart-shaped, custom contour, blush, brow, and lip strategies make all the difference. With AI-powered apps like Makeup Check AI, you can instantly determine your face shape, get personalized makeup maps, and watch step-by-step tutorials tailored just for you. Explore your options, experiment with new looks, and let your face shape guide your beauty journey. The perfect makeup routine is one that celebrates your natural structure—embrace your angles, balance your features, and use technology to unlock your most flattering looks, every day.
FAQ
Q: How do you apply contour for a square face?
A: Contour the outer corners of your forehead, under your cheekbones (angled toward the mouth but stopping mid-cheek), and along the jawline's corners. Blend well to soften angular lines and avoid harsh edges. Use a brush or sponge to blend upward for a natural effect, and avoid bringing contour too close to the center of the face.
Q: Where should blush go on a square face?
A: Apply blush just under the cheekbones and sweep it upward toward the temples. Avoid placing blush too far out on the sides to prevent widening the face. Cream blushes are ideal for blending and keeping the look soft and seamless.
Q: What eyebrow shape is best for a square face?
A: Soft, rounded, or gently arched brows are ideal for square faces. They help balance strong angles and add softness to the overall look. Avoid flat or highly angular brows, as these can make the face appear boxier.
Q: What lipstick colors flatter a square face?
A: Nude, soft pink, and gently defined lips work best for square faces. Avoid sharp, bold outlines that can emphasize the jaw; instead, go for softly blended edges. Matte and satin finishes typically flatter square features.
Q: Should you highlight a square face, and where?
A: Yes, highlight the center of the forehead, upper cheekbones, bridge of the nose, and chin. This draws attention to the center of the face and helps soften the outline. Use a subtle, luminous product to keep the look natural.
Q: What eye makeup looks best for a square face?
A: Smoky eyes, winged liner, and shadow blended at the outer corners help balance a strong jawline. These techniques draw focus upward and outward, creating harmony. Avoid heavy liner on the lower lash line, which can emphasize angularity.