Natural Makeup Look: Step-by-Step Guide for Seamless, Everyday Beauty
Achieve a flawless natural makeup look with expert skin prep, subtle products, and pro application tips. Discover app-powered personalization for every face.

Estimated reading time: 14 min
Key Takeaways
- A natural makeup look emphasizes healthy, glowing skin and subtle features using lightweight products and strategic application.
- Proper skin prep, including cleansing, moisturizing, and sun protection, is the foundation for seamless makeup.
- Minimal coverage, soft blush, natural brows, and sheer lip finishes are key elements for understated beauty.
- Blending techniques and product placement are crucial for a skin-like finish that avoids cakiness.
- Apps like Makeup Check AI offer personalized tutorials, look try-ons, and daily plans to perfect your natural makeup routine.
Table of Contents
- Section 1: Skin Prep for a Natural Makeup Look
- Section 2: Choosing the Right Lightweight Complexion Products
- Section 3: Targeted Concealing for a Flawless Yet Real Finish
- Section 4: Subtle Blush, Bronzer, and Seamless Application
- Section 5: Natural Eye Makeup, Brows, and Lashes
- Section 6: Effortless, Healthy-Looking Lips
- Conclusion
- FAQ
Section 1: Skin Prep for a Natural Makeup Look
1.1 Cleansing for a Fresh Base
The secret to a radiant natural makeup look starts with clean, healthy skin. Use a gentle cleanser suited to your skin type—gel for oily or combination skin, cream or milk for dry or sensitive types. Remove makeup, dirt, and excess oil to ensure products glide on seamlessly. Well-cleansed skin prevents clogged pores and rough patches that can make makeup appear uneven.
Consider double cleansing if you wear sunscreen or makeup daily. Start with an oil-based cleanser to break down makeup and SPF, followed by a gentle water-based cleanser to remove any residue. This ensures your skin is truly clean but not stripped, preventing irritation or dryness that can compromise your makeup base.
An example routine might include: a micellar water or cleansing balm for the first cleanse, followed by a mild foaming cleanser for the second. Spend at least one full minute massaging in your cleanser—this boosts circulation, ensures thorough cleaning, and preps your skin for better absorption of subsequent products.
1.2 Hydration and Moisturization
Hydration is key. Apply a lightweight, non-greasy moisturizer that plumps and smooths your skin without leaving a heavy residue. If you have dry spots, opt for richer creams in those areas. For extra dewiness, layer a hydrating serum underneath your moisturizer. This locks in moisture and creates a supple canvas for makeup.
Look for humectant ingredients like hyaluronic acid or glycerin in your serum—they attract and hold water in the skin. If you have oily skin, choose gel-based moisturizers with a matte finish to control shine. For combination skin, you can "multi-moisturize" by using different products on different areas (e.g., richer cream on cheeks, lighter lotion on the T-zone).
Don’t forget the eye area; pat in a lightweight eye cream if you have dryness or fine lines. Well-hydrated skin minimizes the appearance of texture and helps makeup blend more evenly. Allow each layer to absorb fully before moving to the next step—usually a minute or two is enough.
1.3 Sun Protection for Lasting Results
SPF is non-negotiable, even under makeup. Choose a broad-spectrum sunscreen (SPF 30 or higher). Modern formulas are sheer, blendable, and don’t interfere with makeup application. Sun protection not only shields your skin from damage but also helps keep your complexion even, so less makeup is needed to conceal imperfections.
- Cleanse with gentle, non-stripping formulas
- Hydrate with serums, then moisturize for your skin type
- Always apply a lightweight SPF as the last step
If you’re worried about pilling (when sunscreen balls up under makeup), allow your SPF to set for at least 2–3 minutes before applying primer or foundation. Some mineral sunscreens can leave a white cast—look for tinted or "sheer" labeled versions to suit your skin tone.
Proper prep is the first step recommended in personalized routines from Makeup Check AI, which analyzes your skin’s needs for optimized product layering. The app can even suggest specific product types (for example, recommending a hydrating essence for dry, flaky skin, or a mattifying primer for oily T-zones) based on a quick selfie analysis.
Section 2: Choosing the Right Lightweight Complexion Products
2.1 BB Creams, Sheer Foundations, and Tinted Moisturizers
The hallmark of a natural makeup look is letting your skin show through. Skip full-coverage foundations in favor of:
- BB creams—offer hydration, light coverage, and sometimes built-in SPF.
- Tinted moisturizers—ideal for evening out tone without masking skin.
- Sheer or light-medium foundations—choose buildable formulas to target only where needed.
Apply with fingers for the most natural finish, or use a damp sponge to diffuse product seamlessly. For example, squeeze a pea-sized amount onto the back of your hand, warm it up with your fingers, and dab onto the face. Blend with gentle tapping motions to avoid streaks.
Some top-rated products for a natural look include IT Cosmetics CC Cream, NARS Pure Radiant Tinted Moisturizer, and Glossier Skin Tint. If you struggle to find a perfect shade, consider mixing two tones or using a color-correcting formula for personalized results.
2.2 Application Tips for a Skin-Like Finish
Focus on the center of the face—where redness or unevenness is most common—and blend outward. Use small amounts, adding more only if necessary. Avoid layering too much product, which can quickly look heavy and unnatural.
- Dot product on cheeks, nose, chin, and forehead
- Blend with fingers or a sponge for a second-skin effect
- Let your natural freckles and texture shine through
When using a sponge, dampen it and squeeze out excess water so it’s bouncy but not wet. This helps distribute foundation evenly and prevents a cakey finish. If you use a brush, choose one with soft, synthetic bristles and use circular motions for seamless blending.
For those with textured skin or visible pores, press product into the skin rather than sweeping, focusing on areas that need evening out. This technique helps achieve a skin-like look. Remember: It’s easier to add more product than to remove excess, so work in light layers.
2.3 Primers for Longevity and Smoothness
If your skin is oily or makeup tends to slide off, a lightweight primer can help. Opt for hydrating primers for dry skin or mattifying primers for oily areas. Silicone-based primers can blur pores and fine lines, while water-based primers suit sensitive or acne-prone skin. For more on choosing the right primer, check out our in-depth primer guide.
Apply primer only to areas that need it—usually the T-zone or anywhere makeup tends to break down. Allow primer to set for about a minute before moving on to foundation. This step can help makeup last all day and create a smoother surface for lightweight products.
Makeup Check AI can recommend specific primers based on your skin’s oiliness, dryness, or sensitivity, helping you achieve the best possible natural finish with minimal product.
Section 3: Targeted Concealing for a Flawless Yet Real Finish
3.1 Spot Concealing vs. All-Over Coverage
True natural makeup looks don’t erase every imperfection. Instead, spot-conceal only where needed:
- Blemishes and Redness: Use a creamy, high-pigment concealer that matches your skin tone. Dab gently and blend edges for an invisible correction.
- Dark Circles: For under-eyes, use a lightweight, peach-toned concealer. Avoid thick formulas that can settle into lines.
Apply concealer with your fingertip or a small precise brush, pressing into the skin for the most natural effect. Less is more—start with a pinpoint amount and layer only if needed. For stubborn discoloration, try color-correcting with a peach or green-tinted product before applying concealer.
For redness around the nose or chin, dab a tiny amount of concealer and blend outward. For blemishes, wait until they’re dry (not freshly popped or inflamed) and use a tiny brush to dot directly onto the spot, feathering out the edges. Makeup Check AI’s guidance can help you identify which areas of your face will benefit most from concealing, and which can be left bare for a more authentic look.
3.2 Avoiding Cakey or Heavy Results
Less is more. Use thin layers and build up only if absolutely necessary. Blot with a tissue if you’ve applied too much. If you need extra staying power, set concealer with a touch of translucent powder—focus only on areas that crease or get oily. Leave the rest of your skin fresh and radiant.
To set under-eye concealer without heaviness, tap a small amount of finely milled powder using a fluffy eyeshadow brush. Avoid baking (letting powder sit and absorb oil for minutes), which can create a dry, cakey look. For blemishes, press powder directly onto the spot and dust away excess, rather than sweeping across the whole face.
If you notice creasing or settling, use a clean fingertip to gently pat and re-blend. This keeps the finish skin-like and flexible throughout the day.
3.3 Blending Tools and Techniques
- Fingers warm the product for a seamless blend
- Use a small, fluffy brush for precise application
- Damp makeup sponges can diffuse edges and prevent buildup
Natural makeup is about letting your skin breathe. Many tutorials—like those in this AI-powered tutorial guide—emphasize blending for a barely-there look.
For example, after applying concealer, take a clean, damp sponge and gently tap around the edges to melt the product into your foundation or bare skin. If you use a brush, choose one with soft, loosely packed bristles for a diffused effect. Always check your makeup in natural light to ensure there are no visible lines or texture.
Section 4: Subtle Blush, Bronzer, and Seamless Application
4.1 Cream vs. Powder Formulas
For a truly natural flush, cream blushes and bronzers are your best friend. They melt into the skin, mimicking a genuine glow. Powders can work for oily skin types but should be applied sparingly and blended thoroughly.
Cream formulas are especially forgiving for dry or mature skin, providing a hydrated finish that never looks chalky. To apply, warm a small amount on your fingertip and tap onto the skin, then blend with fingers or a sponge. Powders work best when applied with a fluffy brush and a light hand—build gradually to avoid harsh edges.
Some popular cream blushes include Rare Beauty Soft Pinch Liquid Blush, Glossier Cloud Paint, and Milk Makeup Lip + Cheek Stick. For bronzer, try cream sticks or balms for a sun-kissed effect. If you opt for powders, choose finely milled, non-glittery formulas for the most natural result.
4.2 Placement for a Soft, Healthy Glow
- Blush: Smile and dot cream blush on the apples of your cheeks, then blend upward toward temples for a fresh-faced effect.
- Bronzer: Lightly sweep bronzer along the hairline, under cheekbones, and jawline for subtle warmth—avoid harsh lines.
For added dimension, blend a touch of blush across the bridge of the nose for a sun-kissed look. This "draping" technique mimics the way skin naturally flushes after sun exposure. If you want a lifted appearance, angle your blush slightly higher on your cheekbones rather than directly on the apples.
Bronzer should be subtle; think of it as adding a gentle shadow, not creating stripes. Use a clean brush or sponge to buff out any edges for a seamless transition into your skin or foundation. If you use both cream and powder products, apply creams first, set with a light dusting of translucent powder, then add powder bronzer or blush if desired. This layering helps lock in color without losing a natural finish.
4.3 Highlighter for a Dewy Finish
If you love a glow, tap a liquid or cream highlighter onto the high points of your face: tops of cheekbones, cupid’s bow, and brow bones. Avoid chunky glitter—look for fine, pearlescent formulas that mimic natural radiance.
- Apply creams with fingers for seamless blending
- Layer lightly—build slowly to avoid overdoing it
- Buff out any lines with a clean sponge or brush
For oily skin, stick to subtle powder highlighters with a satin finish. For dry or mature skin, liquid or cream formulas add a healthy sheen without emphasizing texture. To make highlighter extra natural, mix a drop into your moisturizer or foundation for an all-over radiance, or apply directly to the skin after blush for a "lit from within" effect.
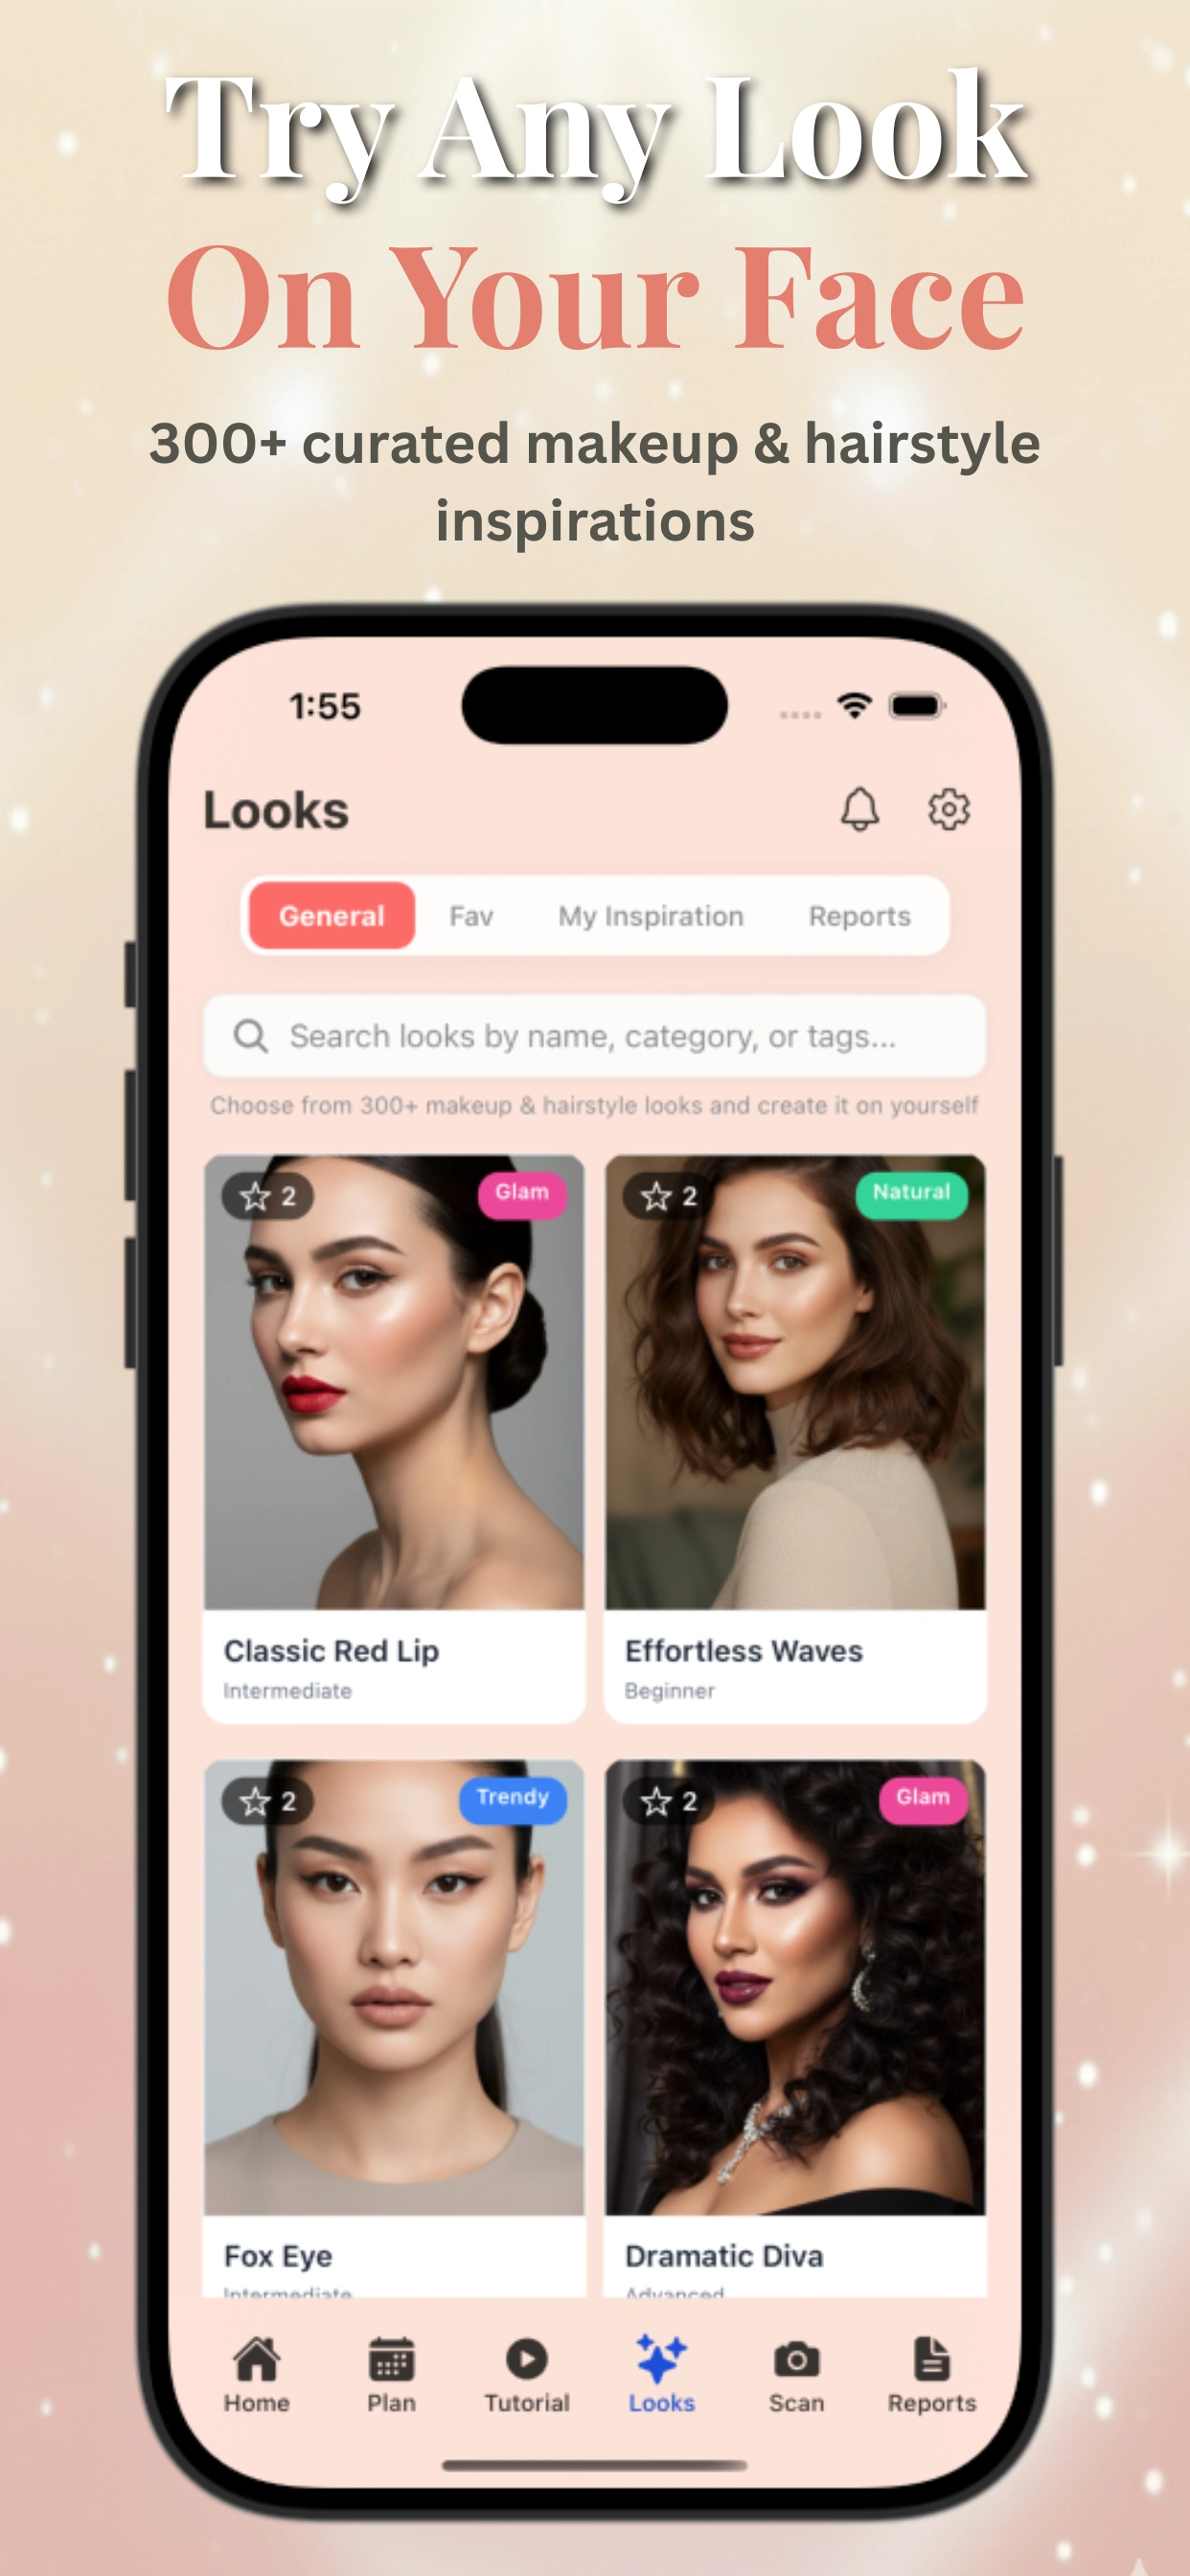
Want to see how blush or bronzer shades will look before you commit? Apps like Makeup Check AI let you virtually try on hundreds of natural makeup looks, instantly previewing results on your unique face. This saves you time and money while helping you discover shades that suit your undertones and face shape.
Section 5: Natural Eye Makeup, Brows, and Lashes
5.1 Neutral Eyeshadow and Minimal Liner
For eyes, less is usually more. Use neutral tones—soft browns, taupes, or subtle peaches. Cream shadows give a wash of color and blend easily with fingers. If you use liner, choose brown over black for a softer effect, and keep it close to the lash line. Smudge lightly for a diffused, natural look.
Try a single-shade eyeshadow look: swipe a cream shadow like Maybelline Color Tattoo or MAC Paint Pot across lids and blend into the crease. For extra definition, use a fluffy brush to blend a slightly darker matte brown into the outer corner. If you want to line your eyes, use a pencil liner and smudge with a brush or your fingertip to soften the line—this technique subtly enhances your lash line without looking harsh.
If you have hooded or deep-set eyes, keep shimmery shades to the center of the lid and mattes to the crease for dimension. For monolids, a gentle wash of one shade across the entire lid is natural and brightening.
5.2 Brow Grooming and Definition
- Brush brows upward with a spoolie to reveal their natural shape.
- Fill in only sparse areas using a fine-tipped pencil or tinted brow gel.
- Avoid overly sculpted or dark brows—aim for a fluffy, feathered finish.
Setting brows with a clear or tinted gel locks hairs in place for a polished yet effortless vibe. Use upward strokes for a "boy brow" effect, or brush slightly to the side for a softer look. If you have very sparse brows, use a brow pen with a microfine tip to draw hair-like strokes and mimic natural growth patterns.
Choose a brow shade that matches your hair color or is one shade lighter for a softer effect. For those with naturally full brows, simply brushing and setting with gel may be all you need.
5.3 Lashes: Mascara or a Naked Lash
- Choose brown or dark brown mascara for a softer look than classic black.
- Focus on lengthening formulas that separate rather than volumize for a natural finish.
- Skip bottom lashes or use whatever remains on the brush for minimal definition.
Some opt to skip shadow entirely and just curl their lashes followed by a single coat of mascara for a truly fresh, wide-awake gaze. Curling opens the eyes and makes lashes look longer without any product. For stubbornly straight lashes, heat your lash curler slightly with a blow dryer for a longer-lasting curl (test on your hand first to avoid burns).
Waterproof mascaras hold curl best but can be drying—use sparingly and remove gently with an oil-based remover. Clear mascara or simple lash serum can also enhance natural lashes for a "no-makeup" effect. To further explore how digital tools can help you experiment with subtle eye looks, read our article on AR beauty try-ons for makeup.
Section 6: Effortless, Healthy-Looking Lips
6.1 Balms, Glosses, and Sheer Lipsticks
A natural makeup look favors lips that look hydrated and soft, not heavily painted. Choose:
- Clear or tinted lip balms for subtle color and moisture
- Glosses with a light sheen for a plump appearance
- Sheer or satin-finish nude lipsticks for understated polish
For those with pigmented lips, opt for a balm with a mauve or berry tint to enhance your natural color. If you want a "my lips but better" effect, choose a shade close to your natural lip tone with a hint of pink or brown. Glosses with hyaluronic acid or peptides can add both shine and hydration, avoiding sticky formulas.
Exfoliate lips once or twice a week with a sugar scrub or soft toothbrush to remove dry skin. This makes your lip products apply more smoothly and appear more radiant.
6.2 Lip Liner for Subtle Shaping
If you want more definition, use a nude or rose-toned lip liner that matches your natural lip color. Outline just the edges and blend inward so there are no harsh lines. Finish with balm or gloss for a seamless transition.
Overlining lips can be natural if done subtly—trace just outside your lip line at the cupid’s bow and center of the bottom lip, then blend with your finger for a fuller appearance. Avoid sharp or dark lines, as these create a more dramatic look. Makeup Check AI can help you experiment with different lip shapes virtually before trying with real products.
6.3 Layering and Blotting Techniques
For longer wear, layer products: apply balm, blot, then add a swipe of sheer lipstick or gloss. This keeps lips comfortable and prevents product settling in lines.
- Hydrated lips reflect light, giving a youthful appearance
- Avoid matte or overly pigmented formulas for everyday wear
If you prefer a bitten-lip effect, dab color onto the center of your lips and blend outward with a fingertip, finishing with clear balm. This technique is especially popular in Korean beauty for achieving a fresh, just-kissed look.
Personalized lip recommendations are part of the beauty reports generated by Makeup Check AI, ensuring your chosen shades suit your complexion and natural undertones. The app can even analyze your teeth’s undertone and recommend shades that help your smile appear brighter.
Conclusion
The natural makeup look is all about celebrating your unique features and enhancing your real skin, not hiding it. With the right skin prep, lightweight products, and thoughtful application, you can achieve a radiant, effortlessly polished appearance that’s perfect for everyday wear or special occasions. Digital tools like Makeup Check AI make the process even easier, offering virtual try-ons, 24/7 guidance, and personalized beauty plans to help you master the art of natural makeup for any face or occasion. For more insights into how AI is revolutionizing beauty routines, explore our post on the future of personalized beauty.
Embracing natural makeup is also about confidence—knowing when to stop adding product and allowing your real skin to shine. Remember, makeup should enhance what you love about your face. Over time, as you experiment with different products and techniques, you’ll discover your personal version of “natural” that suits your lifestyle, skin type, and unique features.
If you’re ever unsure which products or colors flatter you most, use digital tools or consult with a professional. Makeup Check AI can generate a complete step-by-step guide tailored to your individual needs and preferences, making it easier than ever to look and feel your best—naturally.
FAQ
Q: How do you do a natural makeup look step by step?
A: Start with clean, moisturized skin and apply SPF. Use a light layer of tinted moisturizer or BB cream, then spot conceal where needed. Lightly apply cream blush and bronzer for warmth, groom brows, use neutral eyeshadow or skip entirely, apply brown mascara, and finish with a tinted balm or gloss on lips. Focus on blending and minimal product for a seamless, real-skin effect.
Q: What products do you need for a natural makeup look?
A: Essential products include a gentle cleanser, moisturizer, SPF, lightweight complexion product (BB cream or tinted moisturizer), concealer, cream blush, bronzer, neutral eyeshadow, brown mascara, brow gel, and tinted lip balm or gloss. Tools like fingers, a damp sponge, and a spoolie brush help achieve a skin-like finish.
Q: How do you make foundation look natural and not cakey?
A: Choose a lightweight, buildable formula and apply only where needed, starting from the center of your face and blending outward. Use a damp sponge or fingers to press the product into the skin. Avoid layering too much—thin, well-blended layers prevent cakiness and let your natural skin texture show through.
Q: What eye makeup looks best for a natural makeup look?
A: Stick with neutral shadows in tones like taupe, beige, or soft peach. Apply a light wash of color or skip shadow altogether. Use brown eyeliner close to the lash line and smudge for softness. Choose brown mascara for a subtle lift, and keep brows fluffy and defined but not overdrawn.
Q: How do you do a natural makeup look for everyday wear?
A: Prep skin with hydration and SPF, apply minimal coverage (BB cream or tinted moisturizer), spot-conceal, add a hint of blush, groom brows, keep eyes simple, and choose a glossy or balm finish for lips. The key is to enhance, not mask, your natural features for a fresh, everyday look.
Q: What is the difference between a no-makeup makeup look and natural makeup?
A: Both emphasize a fresh, real-skin finish, but a no-makeup makeup look aims to appear as if you're wearing nothing at all, often using even fewer products and ultra-sheer coverage. A natural makeup look allows for slightly more visible enhancement—like blush, subtle bronzer, and defined brows—while still appearing effortless and understated.