Makeup for Softening Sharp Features: Step-by-Step Face Shape Guide
Makeup for softening sharp features made easy. Learn how to determine your face shape and apply contour, blush, brows, and more for a softer, balanced look.

Estimated reading time: 14 min
Key Takeaways
- Learn how to determine your face shape for precise makeup placement.
- Discover expert contour, blush, brow, and highlight techniques to soften sharp features.
- Understand how to adapt makeup for a round face, oval face, heart-shaped face, and square face.
- Master blending and product choices for a natural, non-angular finish.
- Explore how AI-powered tools like Makeup Check AI can create personalized makeup plans for softer features.
Table of Contents
- Section 1: How to Determine Your Face Shape
- Section 2: Contouring Techniques to Soften Sharp Features
- Section 3: Blush Placement by Face Shape
- Section 4: Brow Shaping for Softer Features
- Section 5: Eye, Lip, and Highlighting Tips for a Balanced Look
- Section 6: Blending, Base, and Tools for a Diffused Finish
- Conclusion
- FAQ
Section 1: How to Determine Your Face Shape
Find Your Face Shape in 3 Steps
Before applying makeup for softening sharp features, it’s crucial to know your face shape. This guides where to contour, blush, and highlight for a softer, harmonious look. Here’s how to determine your face shape:
- Step 1: Measure – Use a tape measure or a ruler. Record the width of your forehead, cheekbones, and jawline, plus your face length (from hairline to chin). For accuracy, measure at the widest point of each area. Jot down each measurement so you can compare them easily.
- Step 2: Observe Proportions – Notice your widest and narrowest points. Is your jawline angular or rounded? Is your face longer than it is wide? Take a selfie with your hair pulled back and compare your proportions visually. The alignment of these features will help confirm your shape.
- Step 3: Match to a Shape – Compare your measurements and features to these classic shapes:
- Round: Width and length similar, soft jawline. Cheekbones are usually the widest part, and the overall shape has few angles.
- Oval: Face longer than wide, gentle taper to chin. Forehead is slightly wider than chin, with high, prominent cheekbones.
- Square: Forehead, cheekbones, and jawline similar in width, strong jaw. The jaw is flat or squared off, and the hairline is straight.
- Heart: Wide forehead, narrow chin, high cheekbones. The chin may be slightly pointed, and the face tapers sharply from the forehead.
Why Face Shape Matters for Makeup
Makeup for a round face aims to define and balance softness. In this case, you might want to add dimension and avoid making the face look even rounder. Makeup for a square face focuses on diffusing sharp angles, especially the jaw. This can be achieved by rounding out the edges and avoiding harsh lines in application. For an oval face, most techniques work, but subtle adjustments enhance symmetry—like balancing the forehead and chin or playing up natural cheekbones. Heart-shaped faces benefit from counteracting a prominent forehead and softening the chin, creating a more harmonious appearance.
AI Tools for Face Shape Analysis
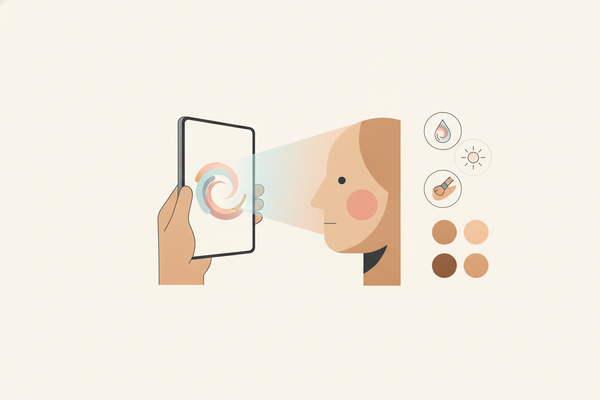
If you’re unsure, apps like Makeup Check AI use facial scanning to instantly analyze your face shape and recommend custom makeup placements. This takes out the guesswork and ensures you’re working with your true features. The app can also show you overlays of suggested contour, blush, and highlight zones based on your unique facial structure, which is especially helpful if you have mixed features or fall between classic categories.
For example, Makeup Check AI can recommend a personalized blend of oval and square techniques if your measurements suggest a mix of both. The app also tracks your progress over time and can remind you if you’re consistently applying product too low or too high for your face shape.
Section 2: Contouring Techniques to Soften Sharp Features
Soft-Sculpt Contour Placement
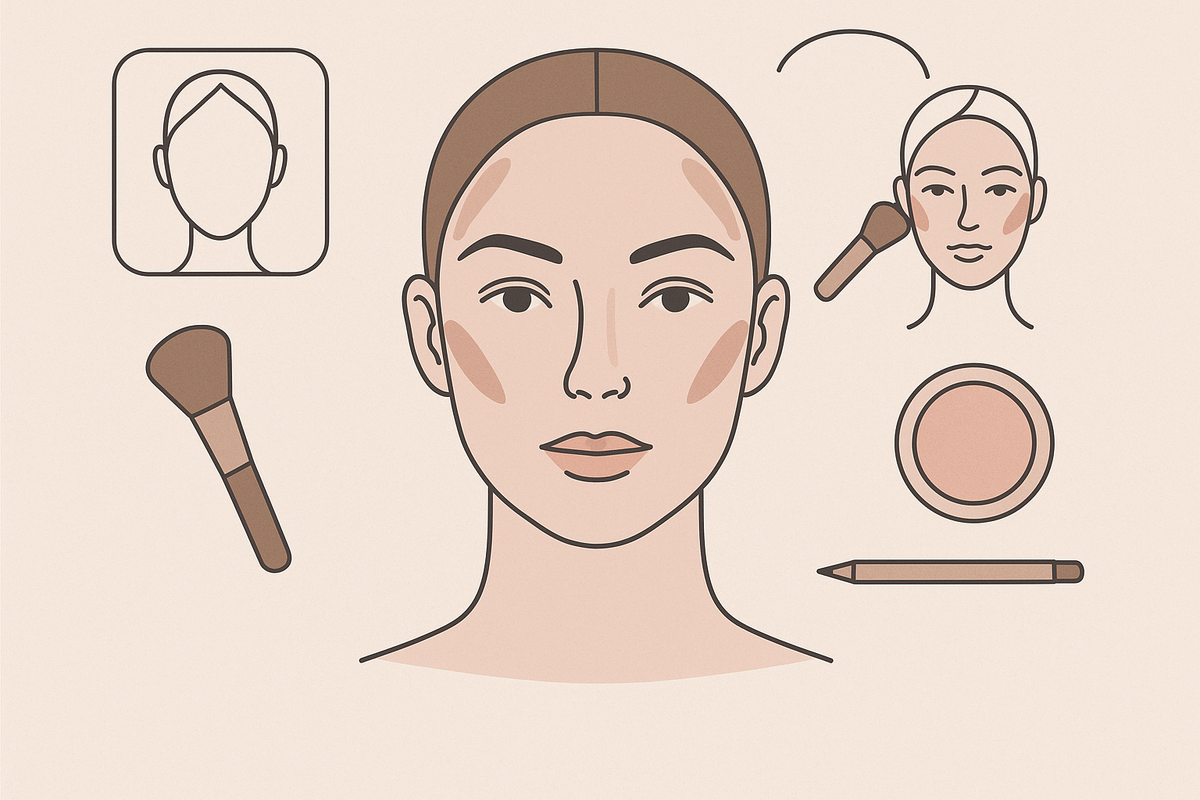
Contouring is the art of creating shadow and light to reshape the face. For softening sharp features, the goal is to blur harsh angles—especially on the jawline, temples, and cheek hollows. Here’s how to contour by face shape:
- Square Face: Apply contour along the jaw’s corners, blending upwards to diminish sharpness. Lightly contour temples to create a rounded effect. Avoid harsh stripes—use small, circular blending to keep edges soft.
- Heart-Shaped Face: Focus contour at the temples and the tip of the chin to soften points. Avoid harsh lines on the lower jaw. Use a minimal amount on the high points of the forehead to balance the wider area.
- Round Face: Contour under the cheekbones and slightly on the sides of the forehead to add gentle definition, not sharpness. Blend upward for a subtle lift.
- Oval Face: Use minimal contour just under the cheekbones for subtle enhancement. A thin line, well-blended, adds depth without altering the natural harmony of the face.
How to Contour for a Softer Look
Key principles for softening:
- Use cream or stick contour products for a natural, blendable finish. Creams melt into the skin and are easier to blend out than powders, making them ideal for a soft-focus effect.
- Apply with a damp sponge or fluffy brush—never a dense brush, which can create harsh lines. The tool you use can make or break the seamlessness of your look. Duo-fiber brushes are particularly effective for a feather-light application.
- Blend outward in small circles, fading color into the hairline and jaw. Take your time; blending is crucial for avoiding artificial lines.
- Choose taupe or soft brown—avoid grayish or overly dark tones. A contour that is two shades deeper than your natural skin tone is ideal. Anything darker can look muddy and enhance angularity rather than soften it.
Jawline, Temples, and Cheek Hollows
For a strong jawline, contour just below the bone and blend upward. This creates the illusion of a shadow that recedes the jaw, making it appear less prominent. On temples, make short, feathered motions rather than a solid stripe. This technique rounds out the sides of the forehead, softening the transition between the forehead and hairline. In cheek hollows, follow your natural bone—don’t drag the product down, as that can look severe. Instead, keep contour higher to gently lift the face and avoid drawing attention to angularity.
Try the “3” technique: Start at your temple, sweep under your cheekbone, and finish just below your jawline, blending throughout. This method is especially effective for square and heart-shaped faces but can be adjusted for any shape depending on where you need softness most.
For more on the science behind AI-generated contour maps, see Makeup AI: Revolutionizing Beauty with Personalized Technology. These tools can generate heatmaps showing optimal contour placement, personalized to your bone structure, which is invaluable for consistent results.
Section 3: Blush Placement by Face Shape
Rounding and Softening Cheekbones
Blush isn’t just about color—it changes the perceived shape of your face. For softening sharp features:
- Square Face: Apply blush in soft, circular motions on the apples of the cheeks, blending slightly upwards but not toward the temples. This rounds out angular cheekbones. For extra softness, you can use a touch of blush along the lower edge of the cheekbone to visually "push" it up.
- Heart-Shaped Face: Focus blush low and central to soften a pointed chin and balance a wide forehead. Blend horizontally. This placement minimizes contrast between forehead and chin, creating harmony.
- Round Face: Place blush just above the apples, blending diagonally toward the ear for a lifted look. This avoids widening the face further and subtly sculpts without harshness.
- Oval Face: Swirl blush directly on the apples for a natural flush. If you desire more definition, sweep lightly toward the temples, but keep edges soft.
Choosing the Right Blush Formula
Cream or liquid blushes blend seamlessly into the skin, avoiding sharp edges. Stick to soft pinks, peaches, or muted mauves for a diffused finish—avoid shimmery or harshly pigmented formulas. If you have oily skin, look for gel-cream hybrids, which stay dewy without sliding. For mature skin, hydrating formulas prevent settling into fine lines, maintaining a plump, youthful effect.
Powder blushes can work as long as they are finely milled and applied with a light hand using a fluffy brush. If you use powder, finish with a setting mist to melt the powder into your base for a natural finish.
Blending for a Seamless Effect
Use a damp sponge or a duo-fiber brush to blend blush into your foundation. Soft, circular motions prevent hard lines and make the color ‘bloom’ from within. If you’ve applied too much, diffuse with a clean sponge or a touch of translucent powder. For stubborn edges, a tiny bit of your foundation tapped over the border can help erase harshness without removing color entirely.
Layering blush helps achieve a multidimensional flush: apply a cream or liquid first, set lightly with powder blush, then finish with a mist. This technique ensures longevity and a seamless transition between color and skin.

Section 4: Brow Shaping for Softer Features
Choosing the Right Brow Shape for Your Face
Brow shape can dramatically alter your overall look. For a softer, more harmonious face, consider these adjustments:
- Soften the Arch: High, angular arches accentuate sharp features. Opt for a gently curved or straight brow to add softness. Avoid creating a "triangle" effect, which can make the face look more severe.
- Fill with Hair-like Strokes: Use a fine-tipped pencil or brow pen to mimic natural hair, avoiding blocky or harsh lines. This technique creates the illusion of fullness without heaviness.
- Focus on Natural Fullness: Fuller, less defined brows look softer and more youthful. Let your natural growth dictate the shape, filling only sparse areas for a feathery finish.
Adapting Brow Shape by Face Shape
- Square Face: A softly rounded arch balances a strong jaw. Avoid flat or highly defined brows, which can emphasize angularity.
- Heart-Shaped Face: Rounded or straight brows soften a pointed chin. Keep the tail slightly extended to balance the width of the forehead.
- Round Face: Slightly arched brows elongate and add dimension. Keep the arch subtle and avoid over-rounding, which can accentuate roundness.
- Oval Face: Classic, moderate arches suit most oval faces. Maintain a natural thickness, and avoid extremes in shape or length.
Taming and Setting Brows
Brush brows upward with a tinted gel for a fluffy effect. Avoid over-plucking; let your natural shape guide you. For extra softness, choose a brow powder over pencil. Powders provide a diffused finish and are less likely to look harsh than pomades or heavy pencils.
For unruly hairs, use a clear or tinted brow gel and press gently with the back of the spoolie to set them in place. Consider a nourishing brow serum if you’ve experienced thinning from over-tweezing. The combination of healthy, full brows and a soft arch will instantly balance angular features.
For more AI-assisted brow shaping, read this detailed AI makeup tutorial.
Section 5: Eye, Lip, and Highlighting Tips for a Balanced Look
Eye Makeup for Softening Angular Features
Strong liner, bold colors, or sharp cut creases intensify angularity. Instead, aim for:
- Soft, Smudged Liners: Use a brown or taupe pencil, smudge with a brush for a hazy effect. Gel pencils also work if you blend quickly before they set. Start at the outer third of the lash line and fade inward for a lifting effect.
- Diffused Eyeshadow: Apply matte, neutral shades with a fluffy brush, focusing color closer to the lash line and blending outward. Layering two or three shades from light to medium creates depth without harsh contrast. If you use shimmer, choose finely milled ones and keep them on the mobile lid only.
- Light Lids: Keep eyelid colors soft—champagnes, light taupes, or gentle rose—avoiding stark white or intense shimmer. This prevents the eye area from looking too dramatic or structured.
You can also soften the lower lash line with a light wash of color instead of a defined line. Mascara should focus on separation and definition, not volume or dramatic length, which can pull the eye downward and emphasize structure.
Lip Techniques for a Fuller, Softer Look
- Blurry Lip Edges: Dab lipstick on with a finger or brush, then blend the edges for a diffused pout. This "popsicle" effect keeps lips looking plush and approachable.
- Gloss or Balm Finishes: Gloss adds plumpness and reflects light, softening the mouth’s outline. Tinted balms are especially forgiving, creating a hydrated, natural look.
- Choose Rounder Cupid’s Bows: Use liner to slightly round the peaks of your lips rather than accentuating points. Fill the center of the lips with a lighter color to add fullness.
For a long-lasting look, layer a cream lipstick under gloss or balm. Avoid matte liquid lipsticks, which can shrink lips and make the mouth appear firmer and more angular.
Highlight Placement Without Emphasizing Angles
- Keep Highlight Subtle: Avoid harsh, glittery highlights on cheekbones or jawlines. Choose cream or liquid highlighters with a fine sheen rather than chunky glitter.
- Focus on High Points: Lightly tap cream highlighter on the top of the cheekbones and the center of the forehead—never sharp lines on the jaw or temples. A touch on the bridge of the nose or above the brows can add dimension without creating angles.
- Blend Well: Use fingers or sponge to melt highlight seamlessly into skin. If you over-apply, blend a bit of foundation or powder over the edge to tone it down.
For added softness, you can also use a highlighting balm on the upper cheek only, skipping the jawline and avoiding harsh strobing effects.
Section 6: Blending, Base, and Tools for a Diffused Finish
Foundation and Base Choices
A flawless, diffused base sets the tone for softened features. Here’s how to select and apply:
- Choose Satin or Dewy Finishes: Matte can exaggerate sharpness, while satin or dewy textures reflect light softly. Look for hydrating foundations or mix a drop of facial oil into your foundation for radiance.
- Apply in Thin Layers: Build coverage only where needed—thick foundation can look mask-like and emphasize structure. Spot-conceal blemishes or redness before adding another layer of foundation.
- Use a Damp Sponge: Press foundation into the skin for a seamless, poreless effect. Always bounce the sponge rather than dragging, which maintains the airbrushed finish.
For a deeper dive into base prep, see What are the best primers for makeup and foundation?. Priming is essential for smoothing texture and extending wear, which is especially important if you use creamy products for softness. Opt for hydrating or illuminating primers if your skin is dry or dull, and avoid mattifying primers on already angular faces unless you’re very oily.
Blending Techniques and Tools
Blending is the key to a non-structured, natural look:
- Duo-Fiber Brushes: These offer a light touch for cream and powder products. They’re especially useful for blush and bronzer since they deposit less product and diffuse pigment easily.
- Sponges: Dampen before use. Press, don’t swipe, to avoid streaks or harsh lines. Sponges can be used for nearly every step, from foundation to blush to highlight.
- Fingers: Warmth from your hands helps cream blush and contour melt into skin. Use tapping motions to avoid disturbing the base underneath.
Swap tools depending on the product: use a brush for dry areas needing light coverage, a sponge for blending, and fingers for sheer washes. Keep your tools clean to avoid muddy application and skin irritation.
Finishing Touches for Softness
- Translucent Powder: Use sparingly to set only where needed, allowing natural radiance to shine through. Focus on the T-zone or areas that crease; leave the cheeks and jawline glowing for softness.
- Mist or Setting Spray: A hydrating spray removes powdery residue and brings all layers together. Look for sprays with glycerin or botanical extracts for extra dewiness. You can also spray your sponge and press it over the skin to further blend products together.
For a final soft-focus effect, lightly press a finishing powder with a luminous sheen onto the high points of your face. This subtly reflects light and blurs lines, without creating unwanted sharpness.
Leveraging AI for Personalized Blending Advice
Apps like Makeup Check AI provide tailored video analysis, showing exactly where to blend and soften based on your facial structure. This ensures every step is customized for your unique features, making it easier to achieve a seamless, harmonious finish.
The app can highlight areas where additional blending is needed and suggest specific tools or motions based on your previous application style. Over time, it can help you refine your blending technique for faster, more polished results, and even provide video tutorials with visual cues mapped onto your own face.
Conclusion
Softening sharp features with makeup is a blend of art and science: understanding your face shape, choosing the right products, and mastering placement and blending. Whether you have a square, heart, round, or oval face, these targeted techniques—gentle contouring, strategic blush, brow shaping, and diffused finishes—can transform angularity into balanced, approachable beauty.
To take your look to the next level, AI-powered tools like Makeup Check AI scan your face, instantly recommend custom placements, and let you try on over 300 looks. This ensures you always get makeup tailored to your unique features, with tutorials and reminders to help you practice and perfect your skills.
As makeup evolves, integrating technology like AI allows for more personalized, precise applications. By combining these expert tips with real-time digital analysis, you can achieve consistently soft, flattering results—no matter your experience level. Keep experimenting, stay patient with technique, and embrace the journey to discovering what makes you feel most confident and comfortable in your skin.
FAQ
Q: How do you soften sharp facial features with makeup?
A: Soften sharp features by using cream contour placed on the jawline, temples, and cheek hollows, blending with a sponge for a natural finish. Apply blush in circular motions to round out sharp cheekbones. Use softly arched, filled-in brows and avoid harsh lines in eye and lip makeup. Choose diffused, dewy base products and blend thoroughly.
Q: Where should blush go to make your face look softer?
A: For a softer look, apply blush to the apples of your cheeks, blending gently upwards and outwards with a damp sponge or fluffy brush. This technique rounds and softens angular cheekbones, especially on square or heart-shaped faces.
Q: What contouring technique makes a strong jawline look less sharp?
A: To soften a strong jawline, contour just below the jawbone and blend upward toward the ears. Use a soft, taupe shade and blend in small circles for a seamless shadow that reduces angularity.
Q: How do you do eyebrows for a softer face shape?
A: Shape brows with a gentle arch or straight line, using fine, hair-like strokes for a natural look. Avoid sharp, high arches and harsh outlines—opt for fullness and softly defined edges to complement softer features.
Q: What eye makeup makes angular features look more balanced?
A: Use soft, smudged eyeliner in brown or taupe, apply diffused eyeshadow close to the lash line, and avoid sharp cut creases or bold wings. Light, blended eyelid colors create a harmonious, balanced appearance.
Q: Should you highlight or contour if you want softer features?
A: Both, but with a light touch. Use subtle contour to blur sharp angles, and apply soft, cream highlight only to the high points without accentuating angular bone structure. Always blend thoroughly for a seamless effect.