Lighting Tips for AI-Ready Selfies: A Complete How-To Guide
Discover essential lighting tips for AI-ready selfies that ensure stunning visuals for humans and AI tools. Learn techniques for optimal selfie lighting.
Estimated reading time: 8 minutes
Key Takeaways
- Soft, even lighting is essential for clarity, contrast, and AI accuracy.
- Leverage natural light or LED ring lights to highlight features without harsh shadows.
- Reflectors and DIY diffusers can eliminate under-eye shadows on a budget.
- Adjust smartphone settings: tap to focus, lock exposure, and enable HDR for balanced shots.
- Proper lighting lays the groundwork for seamless AI enhancements and clean background removal.
Table of Contents
- Understanding the Importance of Lighting
- Essential Lighting Tips for AI-Ready Selfies
- Step-by-Step How-to Guide
- Optimizing Your Setup for AI Enhancement
- AI-Driven Lighting Analysis
- Real-Life Examples and Visual Demonstrations
- Conclusion and Recap
- Call-to-Action
Understanding the Importance of Lighting
Why Lighting Matters
Well-balanced illumination is the foundation of any great selfie. Two core reasons make lighting essential:
- Clarity, Contrast, and Color Accuracy
- Proper light reveals true skin tones and rich details.
- Poor lighting causes faded colors or harsh shadows that hide features and make images look flat.
- Clarity and contrast drive human appeal and prepare the image for AI enhancement.
- AI Facial Detection and Filter Accuracy
- AI algorithms map facial landmarks—eyes, nose, mouth—by analyzing pixel brightness and color.
- In low light, models may misinterpret skin tones or introduce artifacts like noise or blur.
- Consistent illumination helps AI tools apply filters, automatic retouching, or background removal without errors.
(Research shows AI struggles with facial feature recognition in poor lighting; see Stunning Lighting Techniques for AI Art.)
Common Selfie Lighting Challenges
- Uneven illumination → harsh shadows or overexposed spots that confuse both eyes and AI.
- Flat, dull light → loss of facial contours and depth.
- Low-light noise → grainy texture, leading AI to misread details.
Learn to spot and fix these issues before snapping your next AI-ready selfie.
Sources for this section:
Essential Lighting Tips for AI-Ready Selfies
Natural Light Techniques
- Face a Window at 45° or Straight On
- Soft, even daylight reduces harsh shadows and highlights your features.
- In my experience, this simple setup gives a natural glow that AI tools love.
- Golden Hour Magic
- Early morning or late afternoon light casts a warm, diffused glow.
- Avoid midday sun to prevent glare and deep shadows.
- Butterfly Lighting Variant
- Place the light source about 45 cm above eye level, slightly in front.
- Creates a small shadow under the nose, adding contour naturally.
Artificial Lighting Solutions
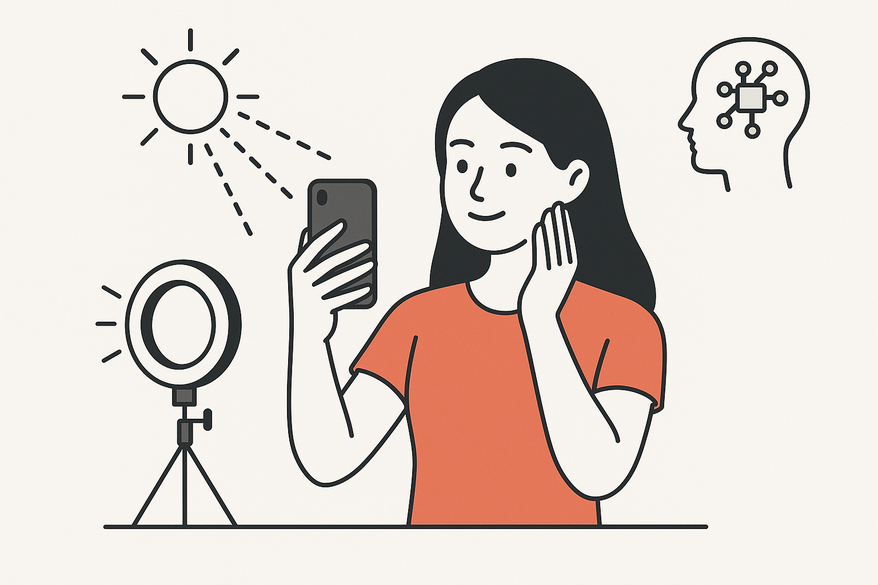
- LED Ring Lights
- Position at eye level, ~50 cm from your face.
- Rotate brightness to remove shadows but keep catchlights in the eyes.
- Softboxes for Studio-Style Softness
- Use two softboxes at 45° angles on either side of your camera.
- Provides broad, even fill to minimize contrast.
- Creative Backlighting with Fill
- Key light behind you to outline your hair or shoulders.
- Front fill (reflector or small LED) to prevent silhouettes and maintain facial detail.
Balancing and Positioning
- Even Illumination – Avoid lighting from one side only; it exaggerates shadows on the opposite cheek.
- Reflectors Under Chin – Use a white foam board or silver reflector to bounce light upward and soften undereye shadows.
- Match Angles – Tilt your face and camera to follow the light direction, highlighting your strongest angles.
Sources for this section:
For more makeup-centric lighting setups, check out: Ultimate Selfie Lighting Makeup Tips, Mastering the Best Angles for Makeup Selfies, and 10 Makeup Photography Hacks to Elevate Your Beauty Shots.
Step-by-Step How-to Guide
- Assess Your Environment
- Indoors: Find the largest window or designate space for your ring light/softboxes.
- Outdoors: Face the sun behind your camera during golden hour; avoid backlit midday shots.
- Set Up Your Light Source
- Natural Light: Position yourself facing the window at a slight angle to diffuse light.
- Artificial Light:
- Ring light at eye level, ~50 cm away.
- Softboxes at 45° on either side of your camera.
- Place a small reflector or white sheet below the chin to lift shadows.
- Adjust Your Smartphone Settings
- Tap to focus on your face; slide exposure up or down to achieve correct brightness.
- Enable HDR (High Dynamic Range) to balance extreme highlights and shadows.
- Lock focus/exposure if your phone allows it to keep lighting consistent across multiple shots.
- DIY & Budget Solutions
- Homemade Reflector: Cover cardboard with aluminum foil to bounce extra light.
- Diffuser Hack: Soften a desk lamp by wrapping its head in white tissue paper.
- Clip-on Ring Light: Affordable (< $20) and portable for on-the-go photo sessions.
Tips on Distances, Angles, and Testing
- Keep key lights 45–60 cm from your face for even coverage.
- Start with a 45° angle to the window or softbox; adjust ±15° to find your best shadow placement.
- Snap test shots and review on a larger screen to check shadow harshness and skin tone accuracy.
Optimizing Your Setup for AI Enhancement
Proper lighting boosts AI-driven tools that rely on well-lit inputs to apply:
- Automatic contouring—light defines cheek and jaw lines precisely.
- Skin smoothing—uniform light reduces reliance on heavy touch-ups.
- Background removal—clear subject boundaries help cutouts look clean.
Recommended Post-Processing Apps
- FaceTune Mobile – Best for subtle smoothing and blemish fixes when base light is even.
- Adobe Lightroom Mobile – Fine-tune color balance, contrast, and white point to match your skin tone.
- Snapseed – Use the “Selective” tool on well-lit areas to boost clarity without overdoing it.
Editing Warning
- Heavy edits on underexposed or noisy shots amplify grain and artifacts.
- Always start with the brightest, cleanest image and make small adjustments.
Sources for this section:
AI-Driven Lighting Analysis
Consider using Makeup Check AI to receive AI-powered feedback on your selfie lighting and composition. The tool can highlight areas to adjust for even illumination and guide your setup.
Real-Life Examples and Visual Demonstrations
Before-and-After Image Ideas
- Side-by-side comparison:
- Left: Selfie in dim indoor light—grainy, loss of detail.
- Right: Same subject under window light or ring light—smooth skin, true colors.
Video Tutorial Pointers
- 30-second clip showing:
- Positioning at a window.
- Setting up a ring light at eye level, 50 cm away.
- Adjusting exposure on your phone’s camera app.
- Timestamp: 00:45 in the YouTube demo for facial recognition in low light.
Alt Text Instructions
- “Subject facing a window at 45° angle; soft natural light illuminating face.”
- “Model under LED ring light—balanced illumination, bright eyes, soft shadows.”
Sources for this section:
Conclusion and Recap
Summing up our lighting tips for AI-ready selfies:
- Prioritize soft, even lighting—natural light from windows or ring lights.
- Use reflectors or DIY fills to eliminate harsh shadows.
- Adjust phone exposure, tap focus, and enable HDR for balanced shots.
- Proper lighting is the foundation for striking selfies that look great to humans and to AI-driven filters.
By mastering these lighting setups, you’ll create selfies that are clear, vibrant, and AI-friendly every time.
Call-to-Action
We’d love to see your setups and results! Share your lighting tips, before-and-after shots, or DIY hacks in the comments below. If this guide helped, please share it on social media to help friends take better AI-ready selfies. Don’t forget to subscribe for more photography and AI enhancement tips.
FAQ
- What makes a selfie “AI-ready”?
- An AI-ready selfie features soft, even lighting that reveals facial landmarks clearly, enabling AI filters and retouching tools to work flawlessly.
- Can I use my phone’s flash for AI-ready selfies?
- Built-in flash often creates harsh shadows and overexposure. Instead, opt for diffused natural light or an LED ring light for better results.
- How do DIY reflectors compare to professional ones?
- Homemade reflectors (foil-covered boards) perform nearly as well as store-bought versions, bouncing light under the chin to soften shadows.
- Is golden hour essential for AI-friendly shots?
- Golden hour provides beautiful, warm light, but consistent window light or balanced studio setups can be equally effective any time of day.