Mastering the Best Angles for Makeup Selfies: A Step-by-Step Guide
Learn the best angles for makeup selfies to highlight your artistry. Discover lighting techniques and posing tips for stunning selfie shots.
Estimated reading time: 8 minutes
Key Takeaways
- Lighting is crucial: natural or artificial options can dramatically change your selfie.
- Angles enhance facial features—experiment with head tilts and turns.
- Camera placement affects perspective; above eye level is often flattering.
- Smartphone features like portrait mode and gridlines elevate your shots.
- Practice with varied poses and expressions to find your signature look.
Table of Contents
- Introduction
- Section 1: Understanding the Makeup Selfie
- Section 2: Lighting for Makeup Selfies
- Section 3: Selfie Tips for Makeup Photography
- Section 4: Techniques and Tools for Best Angles
- Section 5: Before and After Makeup Selfies Examples
- Section 6: Common Selfie Mistakes to Avoid
- Practice with AI Feedback
- Conclusion
- FAQ
Introduction
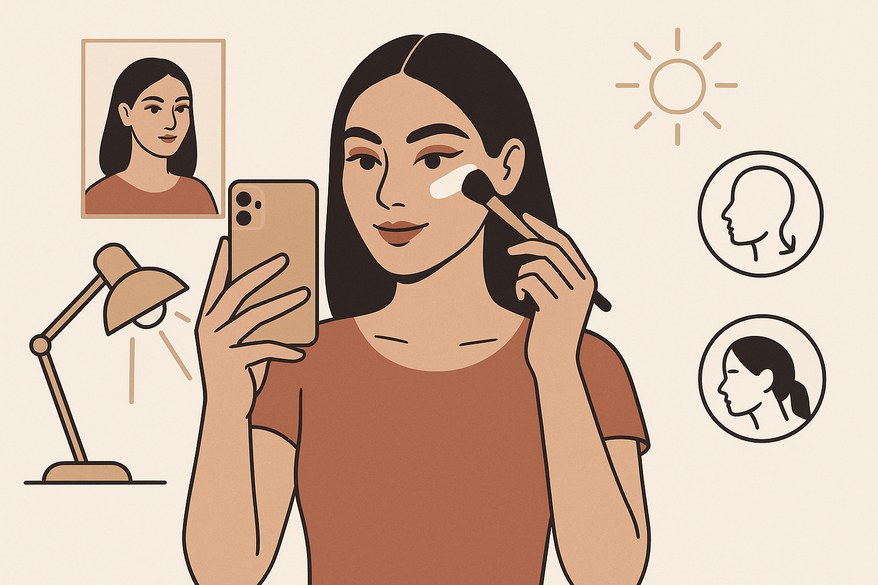
Want your makeup to pop on Instagram? It all starts with the best angles for makeup selfies. This guide reveals how to find your most flattering perspective so your makeup details shine. By mastering the best angles for makeup selfies, you can highlight every contour, blend, and color.
Proper lighting and thoughtful composition can make colors pop and textures glow. Natural, diffused light produces soft, flattering effects that bring out your best features (how to take a good selfie). Golden hour or overcast daylight gives even coverage without harsh shadows, while ring lights and softboxes add consistent illumination. Thoughtful framing and a clear focal point keep the viewer’s eye on your artistry (look and feel your best in photos).
Whether you’re a beauty novice or a professional MUA, understanding how to use lighting for selfies, camera placement, and poses will elevate your makeup photography. Follow this step-by-step blueprint to discover your personal best angles for makeup selfies—and watch your scroll-stopping images rack up likes and shares.
Section 1: Understanding the Makeup Selfie
A makeup selfie is a self-portrait focused on showcasing your makeup application, color choices, and technique. Unlike a casual snapshot, it’s a deliberate beauty shot that highlights artistry.
Why angles matter
- Accentuate cheekbones and jawline.
- Highlight eye makeup details, lashes, and brows.
- Minimize unwanted shadows or texture.
Angles influence how light interacts with your face. The right tilt can enhance blending, show off vibrant pigment, and cut down shine on the forehead or chin. Shadows can add depth to contour or detract from smooth foundation—experiment to find the balance (YouTube tutorial).
Finding your unique best angles for makeup selfies is the first step in perfecting your beauty photography. A small head turn or chin tilt can transform a flat image into a dynamic portrait. Frame your face, focus on your strongest features, and watch your makeup pop.
Section 2: Lighting for Makeup Selfies
2.1 Natural Lighting for Selfies
Natural light is often the most flattering choice for makeup selfies. Soft, even illumination comes from:
- Large windows and open doors.
- Golden hour (just after sunrise or before sunset).
- Overcast skies that diffuse sunlight.
Benefits of diffused daylight:
- Smooths skin texture.
- Makes colors true-to-life.
- Reduces harsh shadows under eyes and chin (how to take a good selfie).
Avoid direct mid-day sun, which casts strong shadows and can overexpose highlights.
2.2 Artificial Lighting Options
When natural light isn’t available, use:
- Ring lights with adjustable brightness.
- Softboxes with diffusers.
- LED panels set to 5,000–6,500K (daylight balance).
Tips:
- Position lights at eye level for even coverage.
- Use two-point lighting (key light and fill light) to soften contrast.
- Never use harsh overhead fixtures—they create dark circles and “raccoon” shadows (look and feel your best in photos).
For more on lighting setups that make your selfies glow, see our Ultimate Selfie Lighting Makeup Tips.
2.3 Facial Structure and Flattering Angles
Your bone structure dictates which angles complement you best. Consider:
- High cheekbones—tilt head down to emphasize.
- Wide forehead—angle slightly ¾ to slim appearance.
- Square jaw—chin-down tilt softens edges.
Small head turns (15° increments) and chin tilts (5° increments) shift light to enhance or minimize features. Experiment in front of a mirror to map your zones of greatest impact (YouTube tutorial).
2.4 Camera Placement and Selfie Perspective
Optimal phone positioning:
- Height: slightly above eye level, angled downward 10–15°. Slims the face, highlights eyes and cheekbones.
- Distance: 6–12 inches for detail shots; 12–18 inches for full-face.
- Symmetry: straight-on for balanced looks, ¾ profile for depth.
Holding your phone above eye line creates natural lift and reduces double-chin. Shooting from below can distort features—avoid unless you want a dramatic, edgy effect (how to take a good selfie).
Section 3: Selfie Tips for Makeup Photography
- Face the window or light source. Soft daylight or a ring light reduces texture.
- Hold your phone just above eye level and angle downward slightly.
- Tilt your chin up or down in 5° increments; note which slims or broadens your face.
- Rotate head left and right in 15° steps; capture full face, ¾ profile, and side views.
- Use mirror preview or gridlines to center your features.
- Activate self-timer or Bluetooth remote for hands-free shooting (YouTube tutorial).
- Take 10–20 shots and review patterns: which tilt, turn, or expression is most flattering? (how to take a good selfie).
Encourage playful expressions:
- Soft smile or natural lips for a friendly vibe.
- Slight smirk or intense gaze for editorial impact.
Section 4: Techniques and Tools for Best Angles for Makeup Selfies
4.1 Advanced Lighting Techniques
- Window light setups:
- Front-lighting for balanced exposure.
- Side-lighting to sculpt the face with shadows.
- Sheer curtains act as natural diffusers.
- Ring light best practices:
- Place 2–3 feet away at eye level.
- Dial brightness to mid-range to avoid glare.
- Use color filters if you want warmer or cooler tones.
- Softbox/LED panel configurations:
- Key light at 45° to your face.
- Fill light opposite at lower intensity.
- Backlight or hair light to separate you from background.
Overcast daylight remains a top diffused light source for consistent, even illumination (YouTube tutorial).
4.2 Smartphone Camera Features
Modern phone cameras rival DSLRs for selfies. Use:
- Portrait/depth mode for bokeh and sharper focus on makeup.
- HDR+ or Smart HDR to balance highlights and shadows.
- Gridlines (rule of thirds) to position eyes along top grid.
- Burst mode for capturing multiple frames per second—ideal for subtle expression shifts.
Models to consider:
- iPhone (Portrait Mode, TrueDepth).
- Samsung Galaxy (Single Take, Live Focus).
- Google Pixel (HDR+, Night Sight for low-light setups).
4.3 Photo-Ready Makeup and Contouring for Photos
Photo-ready makeup uses slightly heavier coverage:
- Foundation: buildable, medium-full coverage to even skin tone.
- Contour: apply bronzer under cheekbones, jawline, and temples.
- Highlight: on forehead center, top of cheekbones, nose bridge. Light-reflecting pigments brighten and make features pop on camera (photo-ready makeup).
Set spray and mattifying powders can control shine under strong lights. Emphasize clean, crisp lines on brows and liner—the camera picks up sharp contrasts.
Section 5: Before and After Makeup Selfies Examples
Image Set 1: Below vs. Above Eye Level
• Below: shadows under chin and cheeks, wider jaw appearance.
• Above: defined jawline, lifted eyes.
Image Set 2: Natural Light vs. Ring Light
• Natural: soft, skin-true finish; minimal shadows.
• Ring: bright catchlights in eyes; even color payoff.
Image Set 3: Straight-On vs. ¾ Profile
• Straight-On: symmetrical, full-face reveal.
• ¾ Profile: dimension, highlighted contours.
Quote from Beauty Influencer: “Lighting is everything—never underestimate soft natural light.” (how to take a good selfie)
Quote from Professional MUA: “Take more photos than you think—you’ll uncover surprising angles!” (YouTube tutorial)
Section 6: Common Selfie Mistakes to Avoid
- Harsh Overhead Lighting
Problem: deep shadows under eyes and chin.
Fix: switch to diffused front or side light (look and feel your best in photos). - Backlighting Yourself
Problem: silhouette effect, loss of makeup detail.
Fix: reposition light source behind camera (how to take a good selfie). - Shooting from Below
Problem: unflattering angles, heavy jawline.
Fix: raise camera above eye level by 10–15°. - Using Only One Angle
Problem: misses your most flattering side.
Fix: capture multiple perspectives—full face, ¾, and profile.
Troubleshooting Sidebar
“If your selfie looks flat or shadowy, adjust your light source by 30° and retake. Even a small shift can improve definition and reduce glare.”
Practice with AI Feedback
For instant, data-driven insights on your angles and lighting, try Makeup Check AI. Watch this quick demo:
Conclusion
With the right lighting, camera placement, and awareness of your facial structure, you’ll discover how to showcase your makeup artistry effortlessly. Use natural or artificial lighting techniques, leverage smartphone features, and apply photo-ready contouring to give your features depth and brightness. Practice selfie techniques—tilts, turns, and expressions—until you uncover your signature look. With these tips for the best angles for makeup selfies, you’ll elevate your beauty photography and build confidence in every shot.
Call-to-Action: Subscribe for more beauty and photography tutorials, from lighting setups to advanced contouring tips. Share your favorite angle or selfie tip below—we’d love to hear what works best for you!
Related posts:
• Expert Photoshoot Makeup Tips for Flawless Looks
• Ultimate Selfie Lighting Makeup Tips: Perfect Your Beauty Photos
FAQ
- How do I choose the right lighting for makeup selfies?
Opt for natural, diffused daylight or a ring light set to daylight balance (5,000–6,500K). Avoid harsh overhead or direct midday sun. - What is the best angle to highlight my contour?
Tilt your head down in small increments to emphasize cheekbones and jawline. A 10–15° camera angle above eye level slims the face and showcases contours. - How can I steady my phone for sharper shots?
Use a tripod, Bluetooth remote, or your phone’s self-timer. Gridlines and burst mode also help capture the perfect moment.