Eyeshadow Placement by Eye Shape: Complete Guide with Tips & Tricks
Master eyeshadow placement by eye shape with expert tips for hooded, almond, monolid, and deep-set eyes. Learn liner and makeup tricks to enhance your look.

Estimated reading time: 18 min
Key Takeaways
- Understanding your eye shape can help guide eyeshadow placement and achieve makeup that complements your natural features.
- Each eye shape—hooded, almond, monolid, deep-set, and upturned—may benefit from specific eyeshadow and eyeliner techniques tailored to its contours and characteristics.
- The core 3-shade eyeshadow structure (light, mid-tone, depth) is a versatile framework that can be adapted depending on eye shape to create dimension, lift, and balance.
- Common eyeshadow placement mistakes can sometimes make eyes look smaller, droopier, or less defined; learning how to avoid these can help enhance your natural beauty effectively.
- Makeup Check AI offers personalized beauty plans, AI-powered analysis, and tutorials designed to tailor your eye makeup based on your unique features and preferences.
Table of Contents
- Section 1: How to Tell Your Eye Shape
- Section 2: Eyeshadow Placement for Hooded Eyes
- Section 3: Eyeshadow Placement for Monolid Eyes
- Section 4: Eyeshadow Placement for Deep-Set Eyes
- Section 5: Eyeshadow Placement for Almond Eyes
- Section 6: Eyeshadow Placement for Upturned Eyes and Lifting Techniques
- Conclusion
- FAQ
Section 1: How to Tell Your Eye Shape
Identifying Your Eye Shape
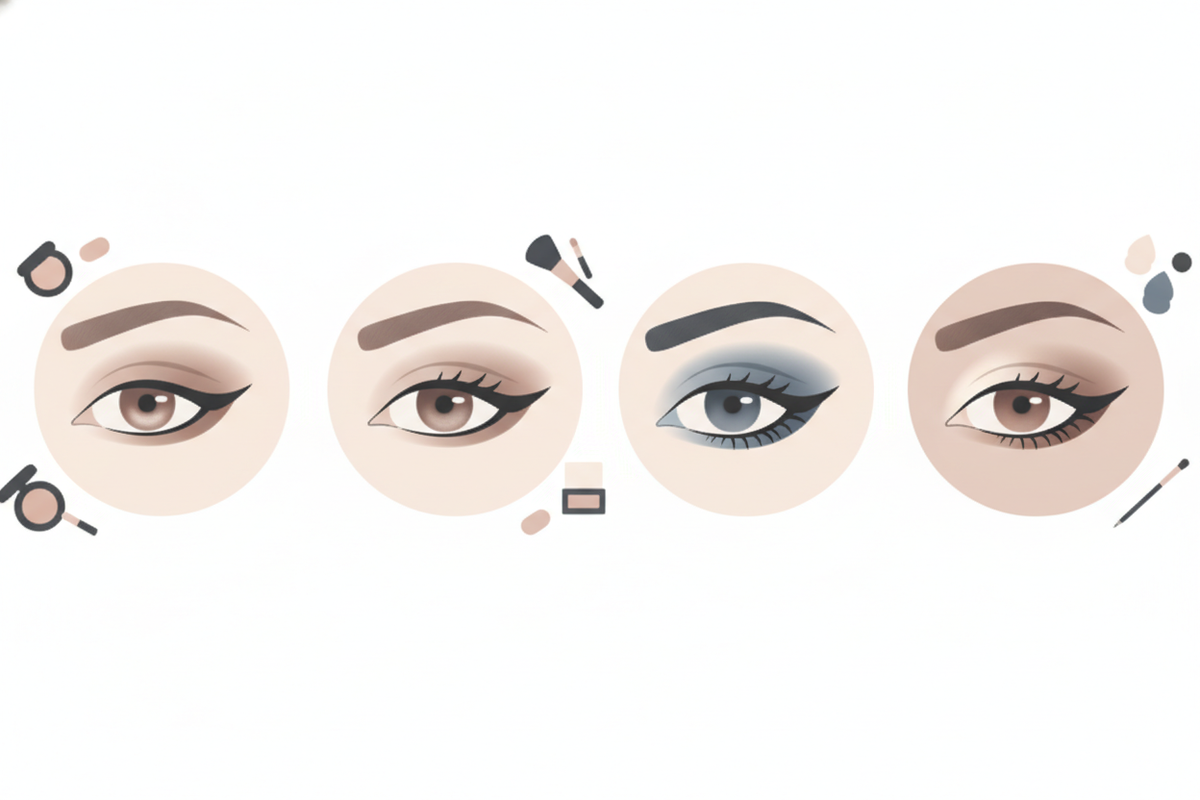
Before mastering eyeshadow placement by eye shape, it’s helpful to identify your natural eye shape. Your eye shape can influence where shadows and liners are applied to enhance your features, create dimension, and highlight natural contours.
Common eye shapes include:
- Hooded eyes: A fold of skin partially or fully covers the eyelid when eyes are open, often hiding the natural crease.
- Monolid eyes: No visible crease; eyelid appears flat and smooth from lash line to brow bone.
- Deep-set eyes: Eyes appear set deeper into the skull with a more prominent brow bone that can cast natural shadow.
- Almond eyes: Oval-shaped with a visible crease, slightly pointed at the outer corners, resembling an almond shape.
- Upturned eyes: Outer corners lift upward slightly, creating a natural cat-eye effect.
Simple Steps to Determine Your Eye Shape
- Stand in front of a mirror under natural lighting with a neutral expression and eyes open.
- Observe the eyelid fold and where the crease lies relative to your lash line and brow bone.
- Examine the shape of your iris relative to the eyelid; note how much white space shows above and below the iris.
- Note if the outer corner lifts, droops, or is level with the inner corner, as this influences the eye shape classification.
- Take photos from multiple angles if needed to better analyze your eye shape.
Why Eye Shape Matters in Makeup
Knowing your eye shape can help you place eyeshadow strategically to bring out your natural beauty and avoid techniques that may unintentionally minimize or distort your eyes. For example, hooded eyes may benefit from placing depth shades above the natural crease to make eyes look bigger and more open, while almond eyes often look great with balanced crease and outer corner shading for definition without harshness. Tailoring your makeup techniques can create a flattering, harmonious look that enhances your features.
Additionally, understanding your eye shape can guide your choice of eyeliner styles, mascara application, and even eyebrow shaping to complement your overall eye makeup.
Section 2: Eyeshadow Placement for Hooded Eyes
Challenges with Hooded Eye Makeup
Hooded eyes have a skin fold that can hide the traditional crease eyeshadow, which may make eyes look smaller or droopier if shadows are applied incorrectly. One common issue is applying darker shades solely in the natural crease, which can be obscured when the eyes are open. This can cause the eyeshadow to be hidden, resulting in a flat or heavy look without dimension.
Another challenge is that hooded eyes may have less visible lid space, so overly dark shadows on the lid can overwhelm the eye and make it appear smaller. Additionally, dragging eyeshadow downwards at the outer corners can contribute to a droopy or tired appearance.
Effective Eyeshadow Placement Techniques
- Place depth shade above the natural crease: Instead of following the hidden crease, create a faux crease by applying a darker depth shade slightly above the natural crease line, where it remains visible with open eyes. This technique can visually lift the eye and add dimension.
- Use mid-tone shades on the mobile lid: Keep the lid color lighter with mid-tone or shimmer shades to prevent heaviness and open up the eye area. Avoid dark shades on the entire lid.
- Highlight the brow bone: Use a light shade or subtle shimmer on the brow bone, focusing on the area just below the eyebrow arch. This lifts the eye and contrasts with the depth shade above the crease.
- Keep outer corner shading upward and outward: When adding depth to the outer corner, blend shadows upward and outward rather than dragging them down. This technique can counter droopiness and elongate the eye shape.
- Use waterproof or long-lasting formulas: To avoid smudging or transfer onto the brow bone area, which can blur the crispness of the faux crease.
Blending and Layering Tips
Blend shadows in thin layers with circular or windshield wiper motions to build depth gradually without harsh lines. For hooded eyes, upward and outward blending is important to creating the illusion of lifted eyes. Use clean blending brushes to soften edges and prevent shadows from settling into fine lines.
Avoid heavy or thick eyeshadow on the lower lash line, as this can weigh down hooded eyes. Instead, use a soft pencil or smudged liner close to the lashes to define without heaviness. Mascara on upper lashes focusing on the outer lashes also complements this lifted look.

Section 3: Eyeshadow Placement for Monolid Eyes
Understanding Monolid Eye Shape
Monolid eyes lack a visible crease, presenting a flat eyelid surface from lash line to brow bone. This unique shape may require a different eyeshadow approach to add dimension and lift, as traditional crease techniques are less effective.
Monolids can vary in lid space and eye size, so tailoring placement and shade intensity can be important for best results.
Strategic Placement for Monolids
- Focus on the outer third: Apply darker depth shades on the outer third of the lid to create shape and lift. Concentrating color here can form a subtle wing that elongates the eye.
- Use gradient shading: Blend mid-tones from the lash line upward in a gradient to avoid flat, horizontal bands of color that might make eyes appear smaller or tired. Gradual vertical blending adds softness and dimension.
- Highlight inner corners: Brighten the inner corner with a light shimmer or matte shade to open up the eyes and add contrast against the darker outer lid.
- Consider shimmer and metallic finishes: These can add dimension and catch light on monolids, especially when applied strategically on the center of the lid or inner corner.
Application Techniques
Use thin layers of eyeshadow, building gradually to avoid heaviness. Blend vertically and slightly outward to create a lifted effect and prevent a flat look. Avoid heavy, unblended shadowing that forms a flat band across the lid, as this can visually flatten the eyes and reduce perceived size.
Using angled brushes can help deposit shadow precisely on the outer lid, while fluffy brushes can blend edges softly. Consider tightlining the upper waterline to define lash roots without breaking the lid's smooth appearance.
Section 4: Eyeshadow Placement for Deep-Set Eyes
Characteristics of Deep-Set Eyes
Deep-set eyes are positioned further back in the skull, with prominent brow bones that create natural shadows over the eyelid. This anatomical structure can sometimes make the eyes appear sunken or smaller if makeup is applied incorrectly.
The challenge with deep-set eyes is balancing the natural shadow with makeup that brings the eyes forward and enhances their shape without deepening the socket further.
Eyeshadow Tips for Deep-Set Eyes
- Use warmer mid-tones on the eyelid: Warm shades like peach, bronze, or soft gold can help bring the eyes visually forward by reflecting light and offsetting the deep-set shadow.
- Blend depth shades on the orbital rim rather than the crease: Applying darker shades softly along the orbital rim, the socket’s edge, instead of a heavy crease shadow, may prevent the eyes from appearing too sunken.
- Highlight the brow bone: Use a matte or satin light shade below the eyebrow arch to lift the eye area and create contrast against the deep-set shadows.
- Keep shadows soft and diffused: Avoid harsh lines or overly dark crease colors which can exaggerate depth.
Blending and Application
Apply shadows in thin, buildable layers to avoid heavy contrast, which can deepen the eyes too much. Use soft, diffused blending outward and upwards to balance shadows naturally and create a harmonious look. Brushes like fluffy blending brushes or tapered crease brushes work well for diffusing color gently.
For eyeliner, opt for thinner lines close to the lash line to define without overwhelming the eye, and consider highlighting the inner corner and lower lash line with light shades to open the eyes.
Section 5: Eyeshadow Placement for Almond Eyes
Why Almond Eyes Are Considered Versatile
Almond eyes feature an oval shape with a visible crease and slightly pointed outer corners, providing a versatile canvas for a wide range of eyeshadow looks. Their balanced proportions allow for dramatic or natural styles with ease.
Because of their shape, almond eyes are often considered a versatile eye shape, but they still benefit from thoughtful eyeshadow placement to enhance their natural contours.
Placement Strategies for Almond Eyes
- Center shadow on the visible crease: Emphasize the natural crease with mid-tone and depth shades to create depth and dimension.
- Balance outer corner definition: Apply depth shades to outer corners using a soft angled wing or V shape, extending slightly outward and upward to elongate the eye.
- Lighten the lid and inner corner: Use light shades or shimmer to brighten the lid and inner corner, creating contrast and opening up the eyes.
- Experiment with layering: Almond eyes can handle layering of colors from matte to shimmer, enabling versatility from daytime natural looks to dramatic evening styles.
Blending and Enhancing
Blend shadows evenly with circular motions to avoid harsh edges and maintain softness. Almond eyes can handle more dramatic liner and shadow shapes, but soft edges maintain elegance and sophistication. Pair with eyeliner that complements your eye shape—such as a classic wing or tightline—to maximize the effect without overpowering the natural shape.
Mascara application focusing on volume and length along the entire lash line further accentuates almond eyes’ balanced shape.
Section 6: Eyeshadow Placement for Upturned Eyes and Lifting Techniques
Recognizing Upturned Eyes
Upturned eyes have outer corners angled slightly higher than inner corners, naturally lifting the face and creating a subtle cat-eye effect. This shape often appears youthful and bright but can be enhanced further with eyeshadow and liner techniques.
Enhancing with Eyeshadow
- Lift outer corners with angled V placement: Apply depth shades angled upward and outward at the eye’s outer corner, mimicking the natural lift and emphasizing the eye shape.
- Use lighter shades on the lid and inner corner: Keeping these areas bright contrasts with the deeper outer corner, adding dimension and openness.
- Extend eyeliner along the natural upward curve: Follow the eye’s natural lift with winged or elongated liner, enhancing the lifted effect without looking forced.
- Contour the lower lash line lightly: Smudge a mid-tone shade softly along the lower lash line, focusing on the outer edge to balance the lift and avoid harshness.
How to Make Eyes Look Bigger with Makeup
Besides shape-specific placement, here are some tips that can help make eyes appear bigger and more awake:
- Highlight inner corners and brow bones: Use light shimmer or matte shades to reflect light and open up the eye area.
- Use tightlining (lining upper waterline): Define lash roots without closing off the eye, creating the illusion of thicker lashes and fuller eyes.
- Apply mascara focusing on outer lashes: Concentrate mascara on the outer lashes to create a lifting, elongated effect.
- Use nude or white eyeliner on the lower waterline: This can visually open eyes by extending the white of the eyes.
- Curl lashes before mascara: Lash curling lifts and opens the eyes further.
For personalized advice and AI-driven makeup plans tailored to your eye shape and features, Makeup Check AI offers an innovative solution with over 300 looks and tutorials. Their AI technology analyzes your unique facial features and recommends customized eyeshadow placements, color palettes, and step-by-step tutorials to help achieve your desired look.
Conclusion
Mastering eyeshadow placement by eye shape can enhance your makeup routine and accentuate your natural beauty. Whether you have hooded, monolid, deep-set, almond, or upturned eyes, adapting your eyeshadow and eyeliner techniques can create a flattering, balanced look that complements your unique features.
Remember the core 3-shade structure—light, mid-tone, and depth—and adjust their placement depending on your eye shape. For example, placing depth above the crease for hooded eyes or focusing depth on the outer third for monolids. Avoid common mistakes like dragging shadows downward on hooded eyes or creating flat bands on monolids, which may diminish your eye's natural allure.
For a personalized experience and to explore detailed looks and tutorials, consider using Makeup Check AI. Its AI-powered reports and beauty assistant can guide you step-by-step to eye makeup matched to your unique eye shape, skin tone, and preferences, helping you feel confident and radiant.
FAQ
Q: How do I apply eyeshadow for hooded eyes?
A: For hooded eyes, placing the depth eyeshadow shade above your natural crease can create a visible fold when your eyes are open. Use lighter shades on the lid and highlight the brow bone to lift the eye area. Blending shadows upward and outward helps create the illusion of lifted eyes, and avoiding dragging shadow downward can prevent the eyes from looking droopier.
Q: Where do you put eyeshadow on monolid eyes?
A: On monolids, focusing eyeshadow on the outer third of the lid with a darker shade can add dimension and lift. Using gradient shading from the lash line upward helps prevent flat horizontal bands of color. Brightening the inner corner with a light shade can open the eyes and create contrast.
Q: What is the best eyeshadow placement for almond eyes?
A: Almond eyes benefit from shadow centered on the visible crease with balanced shading on the outer corner using a soft angled wing or V shape. Light shades on the lid and inner corner brighten the eyes. Blending well emphasizes the natural almond shape, and pairing with eyeliner styles that complement your eye shape creates a polished look.
Q: How should you apply eyeshadow for deep-set eyes?
A: For deep-set eyes, using warmer mid-tones on the lid can help bring eyes visually forward. Blending depth shades softly on the orbital rim rather than in the crease can avoid deepening the eye socket. Highlighting the brow bone lifts and brightens the area, and maintaining soft, diffused blending balances natural shadows.
Q: How do you make eyes look lifted with eyeshadow placement?
A: To lift eyes, applying depth shades angled upward and outward at the outer corners, using angled V shapes and blending shadows toward the brow bone can help. Combining this with upward winged eyeliner enhances the lift effect. Avoid dragging shadows downward, which can create a droopy appearance.
Q: What eyeshadow placement mistakes make eyes look smaller or droopier?
A: Common mistakes include placing shadows only in the natural crease on hooded eyes (which may be hidden when eyes are open), dragging shadows downward on the outer corners, using flat horizontal bands of shadow on monolids that flatten the lid, and applying heavy dark shadows in the crease of deep-set eyes, which can exaggerate the sunken effect. Avoiding these can help maintain bright, open eyes.