Blush Placement: Expert Guide to Flattering, Youthful Blush Application
Master blush placement for your face shape. Discover pro blush techniques, draping, and anti-aging tips with Makeup Check AI for flawless, lifted cheeks.

Estimated reading time: 13 min
Key Takeaways
- Blush placement dramatically influences face shape, lift, and age perception.
- Techniques should vary by face shape—round, oval, heart, square—for the most flattering look.
- The common 'apple of the cheek' method may not suit everyone; strategic placement is key.
- Draping, horizontal, and vertical methods can lift, sculpt, or soften your features.
- Makeup Check AI analyzes your face and suggests personalized blush placement and techniques.
Table of Contents
- Section 1: The Importance of Blush Placement
- Section 2: Blush Placement by Face Shape
- Section 3: Busting the 'Apple of the Cheek' Blush Myth
- Section 4: Pro Techniques—Draping, Lifting, and Modifying Face Proportions
- Section 5: Blush for Mature Skin and Cheekbone Definition
- Section 6: Special Blush Placement—Glasses, Nose, Forehead & Chin
- Conclusion
- FAQ
Section 1: The Importance of Blush Placement
Why Placement Matters More Than Product
Blush is more than a pop of color—it's a sculpting tool that can visually lift, slim, or soften your features. The right blush placement can make you look more youthful, emphasize cheekbones, and even correct facial asymmetry. Conversely, misplaced blush can drag the face down, age your appearance, or widen features unintentionally. Makeup artists often emphasize that placement can account for up to 70% of the effect you see from blush, far outweighing the impact of the specific product or shade chosen. For example, a luxury blush applied too low can look less flattering than a drugstore blush placed skillfully for your bone structure.
Face-Lifting vs. Face-Dropping Effects
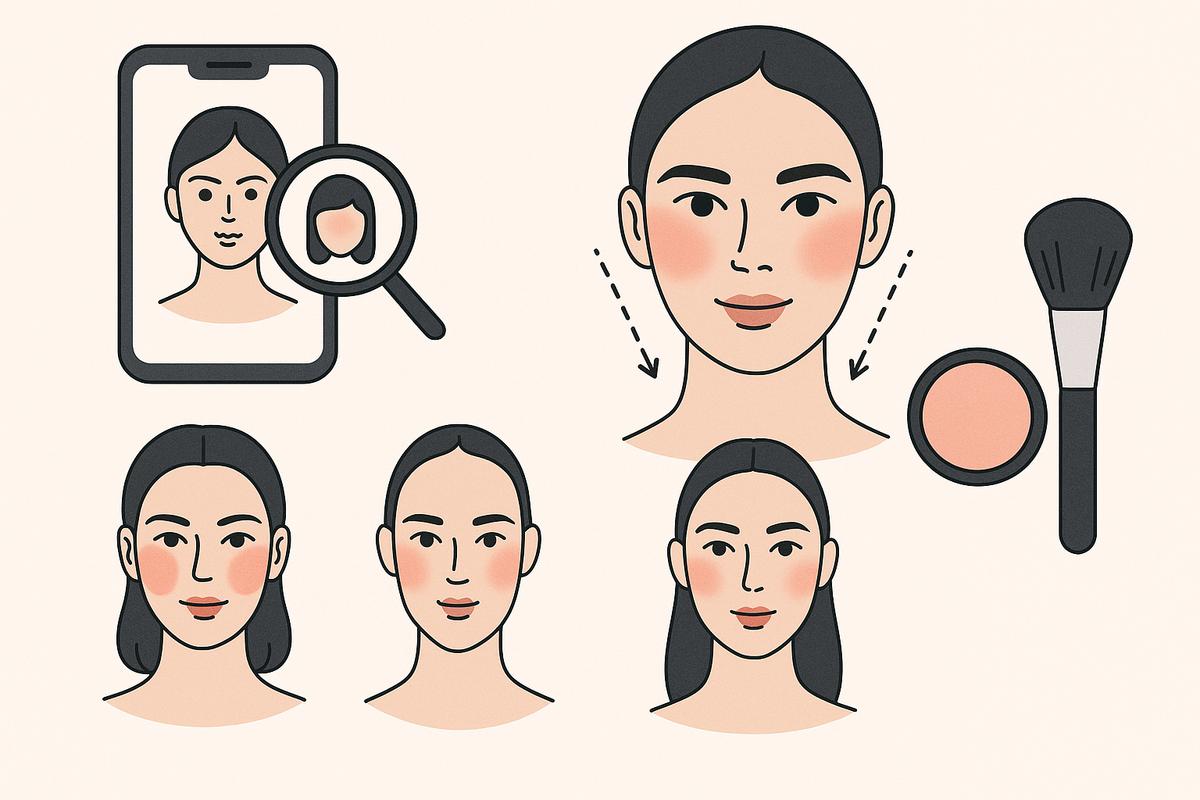
- High, angled blush (swept towards the temples) lifts the face, creating a youthful, refreshed look. This technique draws the eye upward, mimicking the effects of a mini facelift by visually raising the midpoint of the face and making cheekbones more prominent.
- Low, central blush (on the apples or too close to the nose/mouth) can visually drop the face, making features appear heavier or older. Blush that is placed too close to the mouth or jawline can also accentuate jowls or sagging, especially in mature faces.
Why One-Size-Fits-All Advice Fails
Generic advice like "smile and apply to the apples of your cheeks" ignores face shape, age, and desired effect. For instance, applying blush to the apples works well on taut, youthful faces but can create a downward drag on mature skin or round face shapes. Personalized blush application, tailored to your unique structure, delivers dramatically better results. This is where AI-powered beauty apps like Makeup Check AI shine, analyzing your facial proportions and generating custom placement maps for optimal results. The app evaluates symmetry, bone structure, and even lighting to formulate tailored recommendations, helping you avoid common mistakes and discover placement that truly enhances your features.

Section 2: Blush Placement by Face Shape
Round Face: Slimming and Lifting
Round faces benefit from techniques that elongate and add angles. Place blush slightly above the apples, sweeping diagonally towards the top of the ear. Avoid circles directly on the cheeks, which can widen the face. A common mistake is applying blush in a circular motion centered on the cheek, which makes the face appear wider and fuller. Instead, focus on vertical or diagonal placement.
- Start 2 fingers away from the nose to prevent closing in the face and to avoid redness around the nostrils.
- Angle the blush up and out in a soft "check mark" shape, which visually pulls the face upwards and adds the illusion of a higher cheekbone.
- Blend towards the temple for natural lift. Blending is crucial; harsh lines can make the face look blocky or artificial, whereas a soft fade into the hairline creates a seamless, professional finish.
For extra dimension, layer a soft highlighter just above your blush placement on the upper cheekbone. This combination further sculpts and elongates the round face. If you're unsure, use the overlay feature in Makeup Check AI, which maps the ideal blush angle for your specific bone structure.
Oval Face: Versatile and Balanced
Oval faces can wear nearly any blush style due to their balanced proportions. For the most flattering look, apply blush just above the apples and blend towards the ear, following your cheekbone’s natural line. The goal is to accentuate the existing symmetry without distorting the face's length-to-width ratio.
- Keep placement slightly higher than the nostril to maintain lift and avoid dragging features downward.
- Blend softly—avoid overly sharp angles that could create harshness on an otherwise balanced face.
Experiment with both draping (C-shape) and classic cheekbone blush; Makeup Check AI can suggest multiple options and let you preview them virtually before you apply.
Heart-Shaped Face: Softening and Draping
For heart-shaped faces, focus blush lower on the cheek to balance a wider forehead and pointed chin. The draping blush technique (C-shape) works beautifully here, as it softly contours the cheek while blending toward the temple for a harmonious effect. Avoid placing blush too high, which can exaggerate the width of the upper face.
- Start just under the outer edge of the eye; this balances the face’s natural angles.
- Blend in a C-shape up to the temple, softening angularity and connecting the cheek to the forehead in a natural flow.
- Keep color lighter near the center of the face to avoid drawing attention to the chin’s point and to maintain overall softness.
Try using a softer, peach or pink shade for heart-shaped faces, as these hues tend to look more natural on this face type. Makeup Check AI can help you preview different color placements and intensities for your unique features.
Square Face: Soften Angles
Square faces benefit from blush that rounds and softens pronounced jawlines. Concentrate color on the apples, blending out and slightly upwards, to create the illusion of roundness and minimize harsh angles at the jaw.
- Apply slightly below the cheekbone peak. This lower placement softens the face’s angularity without making it look bottom-heavy.
- Blend outwards in a circular motion, avoiding harsh lines that could accentuate the square shape. The goal is a seamless transition from cheek to temple, curving around the side of the face for balanced softness.
For added effect, avoid dark or overly pigmented blushes, which can emphasize the jaw. Instead, opt for buildable, light colors applied in layers for control. Use Makeup Check AI’s jawline mapping tool to visualize the best placement for your face.
Not sure of your face shape? Try the AI-powered analysis on Makeup Check AI for instant, personalized guidance. The app uses facial recognition and mapping technology to determine your shape and suggest the most flattering blush style.
Section 3: Busting the 'Apple of the Cheek' Blush Myth
Why the Classic Advice May Age You
"Smile and dab blush on the apples of your cheeks" has been makeup gospel for decades. But facial dynamics change when you stop smiling—blush on the apples can drop lower, dragging your features down. For many, this technique actually makes the face appear rounder and older. On mature skin, the apple can shift further south and accentuate sagging or loss of volume, making this advice less suitable for anyone over 30 or those with fuller cheeks.
Finding the True 'Apple'—And Why It Matters
The apple of the cheek is the fleshy, most prominent part that pops up when smiling. However, for most people, the optimal blush starting point is just above the apple, aligned with the center of the eye and no closer than two fingers from the side of the nose. Placing blush too medially accentuates nasolabial folds and can make the face appear droopy. It’s also important to consider how your face looks at rest, as the apple "descends" when you relax your expression. This leads to blush sitting too low, which can add years to your face and distort your natural proportions.
The Corner-of-Lip-to-Ear Rule
- Imagine a line from the corner of your mouth to the top of your ear. This line helps define the lower boundary for blush placement, keeping color above where natural sagging might begin.
- Use this as a guide for the lowest point your blush should reach. If your blush falls below this line, it can visually drag down your features and shorten your neck.
- Keeping blush above this line ensures a lifted, youthful effect. It helps maintain the illusion of high cheekbones and prevents the "tired" look that misplaced blush can create.
Pro Tip:
Check your placement in a neutral, relaxed expression—not while smiling—to prevent "blush drop." Many AI makeup tools, like those featured in this deep dive on Makeup AI, now account for these nuances in their recommendations. Makeup Check AI, for example, prompts you to keep a neutral face during analysis to ensure its recommendations work when your face is at rest, not just when you’re posing or smiling.
Another helpful trick: Take a selfie both while smiling and with a neutral expression. Compare where your blush sits in both photos, and adjust upward if necessary. This simple check can make a significant difference in achieving a naturally lifted look.
Section 4: Pro Techniques—Draping, Lifting, and Modifying Face Proportions
The Draping Blush Technique (C-Shape)
Draping refers to blending blush in a "C" from the cheekbone up to the temple. This is especially effective for heart-shaped faces and those seeking a youthful, editorial look. Draping was popularized by makeup artists in the 1970s and remains a go-to for runway models because it naturally connects the cheek and brow area, giving a cohesive, lifted appearance.
- Use a fluffy brush for seamless blending, avoiding streaks and harsh edges.
- Apply blush in a sweeping motion, starting at the mid-cheek and curving up and around the outer eye. This creates a halo effect that looks radiant in both photos and real life.
- Combine with highlighter atop the C-shape for added lift, focusing on the highest point of your cheekbone and just above the brow tail.
For a subtle drape, use a sheer, buildable blush formula. For a bolder editorial look, layer two complementary shades, such as a peach base with a pink accent, and blend well.
Horizontal vs. Vertical Blush
- Horizontal placement (blush runs straight across the cheeks) widens and shortens the face—helpful for long faces or for a youthful, doll-like effect. This is often used in K-beauty looks to give a cute, innocent vibe. Apply blush from the center of the cheek outwards, keeping the line parallel to your jawline for the best effect.
- Vertical or diagonal placement (angled toward the temple) elongates and slims the face, ideal for round or square face shapes. This placement draws the eye up and out, counteracting fullness or heaviness in the lower face.
Try mixing placements to see what best balances your features. For example, use horizontal blush to soften a long face, or combine a vertical lift with a touch on the apples for a custom, modern look. Makeup Check AI allows you to experiment with these placements virtually, saving time and product.
Blush as a Sculpting Tool
Strategic blush application can create the illusion of higher cheekbones, a slimmer face, or a lifted jawline. Layer blush slightly above bronzer or contour for a 3D effect. For example, after applying bronzer in the hollows of your cheeks for shadow, add blush just on top of the bronzer line, blending upward. This technique prevents the "striped" effect and keeps the face looking natural, not over-contoured.
Avoid placing blush below the cheekbone; this can muddy the sculpted look and diminish lift. Instead, keep blush in the upper third of the cheek for the most flattering results. Many pros recommend using a fan brush for precise placement without overloading the skin with product.
Application Methods
- Fingers: Good for creams, allows for warmth and seamless blending. The heat from your fingers helps cream blush melt into the skin, making it ideal for dry or textured skin types.
- Brush: Best for powders or draping; use soft, sweeping motions. Use a medium-sized, dome-shaped brush for even color distribution and to avoid harsh edges. Clean brushes regularly to prevent product buildup and streakiness.
- Sponge: Ideal for a diffused, airbrushed finish—dab, don’t drag. Sponges are especially helpful for blending out highly pigmented blushes or for layering cream and powder products without caking.
Pro tip: For a seamless blend, use a clean brush or sponge to gently buff the edges of your blush after application. This ensures there are no visible lines and the blush looks like a natural flush.
Curious about how tech can improve your technique? Check out the AI Makeup Tutorial article for more on smart beauty routines. Makeup Check AI offers step-by-step video overlays, which can help you master advanced techniques at home.
Section 5: Blush for Mature Skin and Cheekbone Definition
Challenges of Blush on Mature Skin (Over 50)
As skin loses collagen and elasticity, cheek volume shifts downward. Traditional blush placement can accentuate sagging or fine lines, especially if applied too low or close to the nose. Mature skin also tends to be drier, so creams or gels may blend more naturally than powders. Another common challenge is texture: powder blush can cling to dry patches or sit in fine lines, while cream formulas offer a dewy, plumping effect.
Mature faces may also have more pronounced nasolabial folds or marionette lines. Placing blush too close to these areas can highlight them, so it's best to focus color higher and further from the center of the face. Makeup Check AI takes age-related changes into account, recommending placement that lifts and refreshes without settling into lines.
Tips for a Youthful, Defined Look
- Lift blush higher on the cheekbones—just above where you feel the bone when you smile. This visually pulls the face upward and restores lost volume.
- Avoid placing blush in the nasolabial (smile line) area, which can make lines appear deeper.
- Use light, upward strokes to create a "lifting" illusion. Think of "painting up," not out or down.
- Choose satin, glow, or cream formulas for a fresh, non-cakey finish. Look for blushes with nourishing ingredients like vitamin E or hyaluronic acid for added hydration.
An extra tip: If you notice blush fading quickly on mature skin, apply a small amount of setting spray before and after blush to lock in color without drying out your complexion.
Defining Cheekbones
- Blend blush from the highest point of the cheekbone toward the hairline for instant definition. This visually lifts the cheeks and draws attention to the eyes.
- Layer a subtle highlighter just above blush for added sculpting. Stick to finely milled, non-glittery formulas to avoid emphasizing texture.
- Keep blush out of the hollows (reserved for contour/bronzer). This prevents a muddy look and maintains a crisp, youthful cheekbone highlight.
For those with naturally strong cheekbones, use a sheer blush formula and apply sparingly to avoid an overly sculpted, severe appearance. For flatter cheekbones, a slightly brighter blush shade will help create the illusion of more lift.
Personalization with AI Tools
If you’re unsure where your cheekbone sits or need help with blending, digital tools like Makeup Check AI provide face scans and overlay guides, making pro-level application accessible to everyone. The app can even suggest the best brush or formula based on your skin type and age, streamlining your routine for maximum results with minimal effort. Many users report feeling more confident and looking more refreshed after following AI-generated maps for mature skin.
Section 6: Special Blush Placement—Glasses, Nose, Forehead & Chin
Blush Placement for Glasses Wearers
Glasses can cast shadows or visually cut the face. To counteract this:
- Place blush higher than the bottom rim of your glasses to ensure it peeks out above the frames and isn’t hidden behind the lenses. This helps maintain a lifted look, even when your frames are bold or oversized.
- Keep color away from the nose bridge to prevent redness, which can be exaggerated by the natural shadows glasses cast in this area.
- Opt for a soft, blended look that peeks out from behind frames, avoiding harsh lines. Use a lightweight hand to build color gradually and ensure the blush doesn’t compete with your eyewear.
For metal or thin-rimmed glasses, you can use a slightly brighter blush for contrast. For thick or colorful frames, keep blush tones neutral to avoid clashing. Makeup Check AI can analyze your glasses style and recommend the best shades and placements for your overall look.
Blush on the Nose, Forehead, and Chin
For a cohesive, sun-kissed look, add a touch of blush to the bridge of the nose, center of the forehead, and chin. This technique, often called "draping," ties the face together and mimics a natural flush. The "draped" blush effect is especially popular in editorial and runway makeup, but can be worn subtly for everyday freshness.
- Use a light hand—this should look effortless, not clownish. A single dab on the nose bridge and a gentle sweep on the forehead and chin is usually sufficient.
- Works especially well for youthful, natural, or editorial makeup styles. In summer, this can mimic a natural tan, while in winter, it adds warmth to the complexion without relying on bronzer.
This technique is also excellent for bringing together the whole face when you’re using multiple blush shades. For example, if you use a peach on your cheeks and a pink on your nose, blend the two slightly where they meet for seamless harmony.
Tools and Blending Methods
- Brush: For controlled application—great for glasses wearers needing precision. A small, angled brush works well for nose and chin application without disturbing other makeup.
- Sponge: Blends color seamlessly, especially on the nose and smaller areas. Use the tip of a damp beauty sponge for precise, diffused application.
- Fingers: Allows for warmth and control, especially with cream blushes. Use tapping motions to prevent moving foundation or concealer underneath.
For best results, set cream blush with a light dusting of translucent powder, especially in areas that may get oily (forehead, nose, chin). This locks in color and prevents fading or patchiness throughout the day.
For more ideas on transforming your look virtually, explore our guide to AR Beauty Try-On and see how these techniques play out in real time. Makeup Check AI’s virtual try-on feature lets you experiment with blush placement on your live image, so you can see the difference in real time before you commit.
Conclusion
Blush placement is a powerful skill that can lift, sculpt, and refresh your entire look—but only when tailored to your individual features. Forget one-size-fits-all advice: consider your face shape, age, and personal style. Use vertical placement for lift, draping for softness, and strategic blending for definition. Don’t be afraid to experiment with placement on the nose or forehead for a modern, cohesive finish.
If you’re new to blush or looking to improve your technique, start by identifying your face shape and studying your bone structure in different lighting. Take photos at rest and while smiling to ensure your blush sits where you want it in real life. Then, use tools like Makeup Check AI to get personalized, data-driven recommendations that go beyond generic beauty advice. With practice and the right guidance, you’ll quickly discover which placements make you feel most confident and radiant.
Ready to see what truly flatters your features? Try the personalized AI blush analysis on Makeup Check AI—your virtual beauty team for smarter, more confident makeup.
FAQ
Q: Where should I place blush to make my face look younger?
A: For a more youthful appearance, apply blush slightly above the apples of your cheeks, blending up toward the temples. Avoid placing blush low or close to the nose, as this can drag the face down and accentuate sagging. Focus on creating lift by keeping blush above an imaginary line from the corner of your mouth to the top of your ear. Creamy, dewy blushes also tend to give a fresher, more plumped-up look, especially on mature skin.
Q: How do I apply blush for a round face shape?
A: Start blush above the apples of your cheeks and sweep it diagonally toward your temples. This vertical, angled placement elongates and slims the face. Avoid circular application on the cheeks, which can make the face look wider. For extra definition, combine blush with a subtle highlighter above and a bit of contour below the cheekbone. Makeup Check AI can generate a step-by-step map showing precise angles for your unique features.
Q: Is it wrong to put blush on the apples of my cheeks?
A: While traditional advice recommends the apples, this placement can cause blush to drop too low when you're not smiling, resulting in a heavier or aged appearance. Most people benefit from starting slightly above the apple and blending outward and upward for a lifted look. The exception is for very youthful faces with high, prominent cheekbones—here, apple placement can look fresh and natural. Always check your placement with a neutral expression before finishing your makeup.
Q: What is the draping blush technique and how do I do it?
A: Draping is applying blush in a C-shape from the cheeks up to the temples. Use a fluffy brush to blend color along the cheekbone and around the outer eye, curving toward the hairline. This technique is especially flattering for heart-shaped faces and creates a soft, lifted effect. For a more dramatic editorial look, try layering two shades or extending the drape above the brow. Makeup Check AI offers virtual draping overlays so you can preview the effect before applying.
Q: How do I apply blush if I wear glasses?
A: Place blush higher on your cheeks so it sits above the bottom rim of your glasses. Keep color away from the nose bridge to avoid highlighting redness. Blend well to ensure the blush is visible but not overpowering behind your frames. If you wear colored or bold frames, choose a blush shade that complements rather than clashes with your eyewear. Makeup Check AI can analyze your glasses style and recommend the most flattering blush placement and hue.
Q: Where exactly is the 'apple' of the cheek for blush placement?
A: The apple of the cheek is the most prominent, rounded part that appears when you smile. However, for most flattering results, apply blush just above this area, aligned with the center of your eye and about two fingers away from your nose. This placement ensures lift and avoids drawing attention to nasolabial folds or sagging. Always check your blush placement in a relaxed, neutral expression before finishing your look.