Makeup Layering Techniques: The Complete Guide to a Flawless, Long-Lasting Finish
Discover makeup layering techniques for a flawless, long-lasting finish. Learn step-by-step how to apply products for natural, extended wear.
Estimated reading time: 8 minutes
Key Takeaways
- Proper sequencing ensures a smooth, natural finish and extended wear.
- Layering in thin, even coats prevents patchiness, cakiness, and creasing.
- Customize your routine with advanced strategies like double priming and color correcting.
- Use the right tools—from foundation brushes to beauty sponges—for seamless blending.
- Troubleshoot common pitfalls by prepping skin properly and setting each layer.
Table of Contents
- Why Makeup Layering Techniques Matter
- The Basics of Makeup Layering
- Common Mistakes & Solutions
- Advanced Layering Strategies
- Tools and Products for Successful Layering
- Step-by-Step Tutorial Example
- Tips, Tricks, and Common Pitfalls
- Conclusion
Why Makeup Layering Techniques Matter
Layering makeup properly ensures a smooth, natural finish and significantly extends wear time. Without the right application order, makeup can crack, slide off, or look uneven. Here’s why layering matters:
- Smooth, Natural Finish
– Proper sequencing prevents patchiness and highlights.
– Builds a breathable, skin-like appearance. - Extended Wear
– Product longevity improves when each layer locks into the next.
– Sweat, oil, and daily movement won’t break down your look. - Customized Coverage
– Target redness or blemishes without heavy layers.
– Spot-treat areas with concealer for precise coverage. - Everyday Routine Examples
– Concealer over foundation under eyes for extra brightening.
– Setting face and under-eye with powder to prevent creasing.
– Touch-ups using a translucent powder to revive mid-day wear.
The Basics of Makeup Layering
Follow this step-by-step sequence to maximize product performance and finish:
- Moisturizer
– Hydrates skin and creates an even base.
– Locks in moisture to prevent makeup from clinging to dry patches.
For detailed prep, see ultimate pre-makeup skincare routine. - Primer
– Smooths texture and helps makeup adhere.
– Choose hydrating, mattifying, or pore-filling based on skin needs.
Explore our top primer picks. - Foundation
– Evens skin tone; select liquid, cream or powder for your skin type.
– Dot in key areas and blend outward for a natural fade.
Learn more at how to apply foundation evenly. - Concealer
– Targets dark circles and blemishes.
– Apply in thin layers, building coverage where needed to avoid cakiness. - Setting Powder
– Locks cream and liquid products in place.
– Lightly dust under eyes and T-zone to prevent shine.
Source: video tutorial. - Bronzer & Blush
– Build dimension with light, blendable layers.
– Start with a sheer sweep and intensify gradually. - Highlighter (Optional)
– Adds glow on cheekbones, brow bone, and cupid’s bow.
– Use sparingly for a dewy radiance. - Eye Makeup
– Apply eyeshadow from light to dark shades for depth.
– Finish with eyeliner and mascara to define lashes. - Lip Color
– Layer lip liner, lipstick, and gloss for dimension and staying power.
– Blot and reapply for extra hold. - Setting Spray/Powder
– Final seal for extended longevity.
– Mist evenly or lightly dust to finish.
Sequence Importance
• Correct order prevents patchiness or caking.
• Skipping steps leads to uneven application.
• Build in thin layers to avoid a heavy finish.
Sources: layering demo, powder setting guide.
Common Mistakes & Solutions
- Skipping Skin Prep → Uneven base. Always moisturize first.
- Mixing Oil- and Water-Based Products → Separation. Match textures.
- Over-Layering → Cakey finish. Build coverage gradually.
- Not Setting Creams → Smudging or creasing. Use powder or spray.
Advanced Layering Strategies
Elevate your routine with these professional tactics:
- Double Priming for Balance
Use a hydrating primer, then a mattifying primer in oily zones to control shine and retain moisture.
Source: advanced priming tips. - Multi-Layer Contouring & Highlighting
Apply cream contour and blend with a damp sponge; set with powder contour for deeper definition. Finish highlight with cream and top dust of powder. - Color-Correcting Under Concealer
Use peach or orange corrector under eyes, green corrector on redness, then apply thin concealer for seamless coverage.
Source: color correction guide. - Adaptations by Skin Type
• Oily: Mattifying primer, powder foundations, blot between layers.
• Dry: Hydrating primer, cream-based products, minimal powder. - Blending Techniques
Use buffing brushes or damp sponges for creams and liquids; fluffy brushes for powders. Employ feather strokes and circular motions for seamless transitions.
Sources: sponge blending, brush blending.
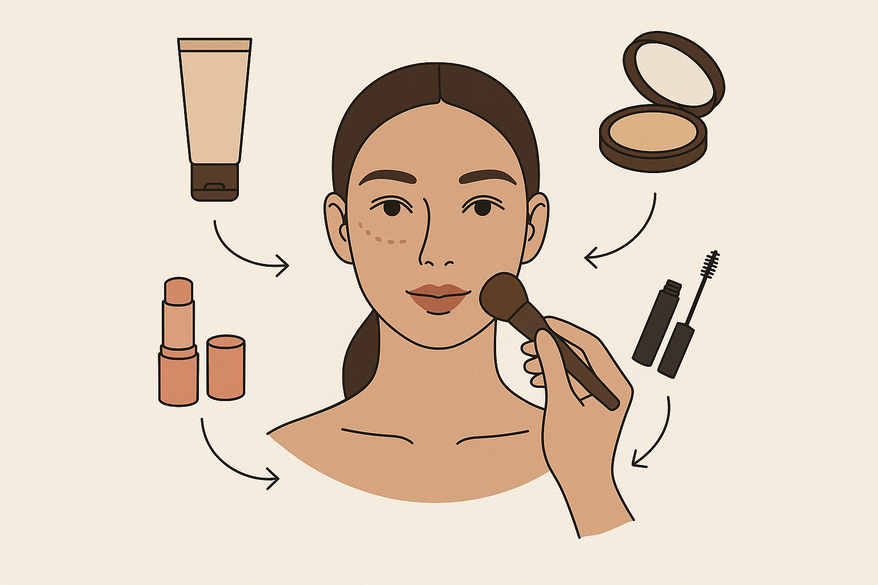
Tools and Products for Successful Layering
Your makeup tools and product choices make a huge difference. Key essentials include:
- Essential Tools
Flat foundation brush, dense buffing brush or beauty blender, fluffy powder brush, precision brushes, and powder puff.
Source: tool recommendations. - Product Characteristics
Lightweight, buildable formulas; finely milled translucent powders; matching cream and powder families for compatibility. - Example Product Pairings
1. Hydrating Primer + Dewy Foundation (e.g., Smashbox + Fenty).
2. Cream Blush + Matching Powder Blush (e.g., NARS).
3. Silicone-Based Primer + Silicone-Based Setting Spray (e.g., Milk + Urban Decay).
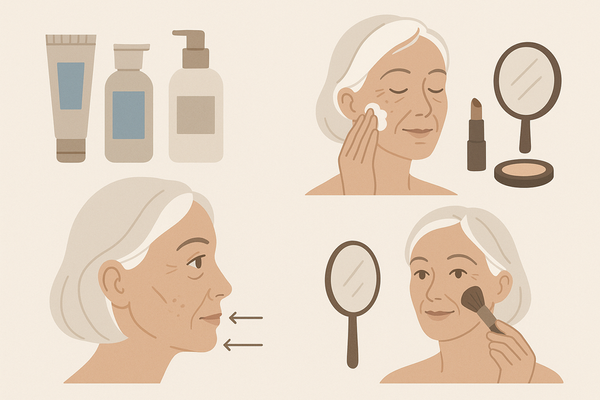
Step-by-Step Tutorial Example
- Prep Skin
Apply moisturizer; let absorb (1–2 minutes).
Source: skincare prep. - Prime
Use a pea-sized amount on T-zone and cheeks.
Source: priming tutorial. - Foundation
Dot on forehead, cheeks, chin; blend outward with a damp sponge.
Source: foundation application. - Concealer
Dab under eyes and blemishes; blend edges gently.
Source: concealer tips. - Set Face
Lightly dust translucent powder on under-eyes and T-zone.
Source: setting powder guide. - Bronzer/Blush
Sweep bronzer in a “3” shape; add blush to cheeks and blend upward.
Source: bronzer & blush. - Highlighter
Apply on cheekbones, nose bridge, cupid’s bow.
Source: highlighting. - Eyes
Eyeshadow from light to dark; liner and mascara to define lashes.
Source: eye tutorial. - Lips
Line lips, fill with lipstick, top with gloss.
Source: lip layering. - Finish
Mist setting spray for 10–15 seconds.
Source: final seal.
Practice Tip:
Work in thin layers; check in natural light and adjust blending as needed.
FAQ
- What is makeup layering? Layering is the process of applying products in a specific order to build coverage, enhance finish, and extend wear.
- Why does order matter? Each layer locks into the next, preventing patchiness, caking, and premature fading.
- How can I avoid cakey makeup? Build in thin, even layers and set each cream or liquid product with powder or spray.
- What tools are essential? A flat foundation brush, beauty blender or buffing brush, fluffy powder brush, and precision brushes are key.
- How to adapt for oily skin? Use a mattifying primer, powder-based foundations, and blot excess oil between layers.