Face Makeup: Step-by-Step Guide for a Flawless Look with AI Tools
Discover the ultimate face makeup step-by-step guide. Learn skin prep, foundation, concealer, contour, and more—plus how AI apps personalize your routine.

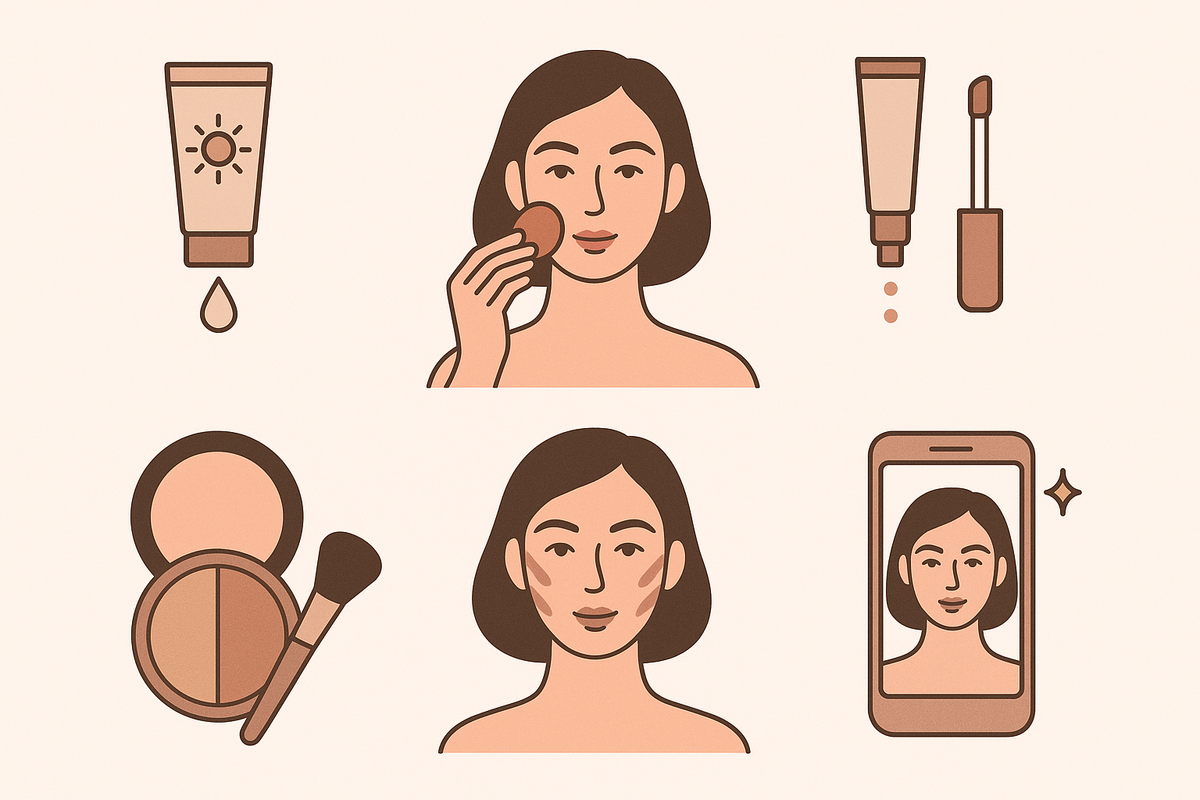
Estimated reading time: 13 min
Key Takeaways
- Mastering face makeup step-by-step ensures a flawless, long-lasting finish.
- Proper skin prep is as crucial as the makeup itself—don’t skip cleansing, moisturizing, and priming.
- Choosing the right foundation shade and applying in the correct order prevents cakey or uneven results.
- Strategic use of concealer, powder, blush, bronzer, contour, and highlighter creates dimension and glow.
- AI-powered beauty apps like Makeup Check AI offer personalized tutorials, look generation, and technique analysis for every skill level.
Table of Contents
- Section 1: The Importance of Skin Prep Before Makeup
- Section 2: Foundation—Shade Selection and Application
- Section 3: Concealer Placement for a Flawless Canvas
- Section 4: Setting Your Base With Powder and Spray
- Section 5: Adding Dimension—Blush, Bronzer, Contour, and Highlighter
- Section 6: Brows, Eye Makeup, and Lips—Finishing Touches
- Conclusion
- FAQ
Section 1: The Importance of Skin Prep Before Makeup
Cleansing: The First Step
Any effective face makeup step-by-step guide begins with a clean slate. Cleansing removes dirt, oil, and leftover skincare or makeup residue, preventing breakouts and helping products adhere evenly. Use a gentle, sulfate-free cleanser tailored to your skin type—gel for oily/combination, cream for dry, or micellar water for sensitive skin. Rinse thoroughly and pat your face dry, never rub.
Moisturizing and Sunscreen—Non-Negotiables
Moisturizer plumps the skin, smooths texture, and creates a hydrated base, making foundation glide on. Even oily skin types need hydration; opt for oil-free formulas if needed. Layer a broad-spectrum sunscreen (SPF 30+) after moisturizer if you’ll be exposed to sunlight—this shields skin and prevents premature aging. Let each layer absorb fully before moving on.
Primer: Enhancing Wear and Texture
Primer is a game-changer, yet often overlooked. It fills in pores and fine lines, controls oil or dryness, and anchors makeup for hours. Choose your primer based on your needs: mattifying for oily skin, hydrating for dry, blurring/smoothing for texture, or color-correcting for redness or sallowness. Apply a pea-sized amount with fingers, focusing on areas prone to shine or fading. For more on selecting your perfect primer, check out this comprehensive primer guide.
- Double-cleanse if you wore sunscreen or heavy makeup the night before.
- Use a lightweight, absorbed moisturizer so your base doesn’t pill.
- Let primer sit for 2–5 minutes before foundation for best results.
Proper skin prep is the foundation (pun intended!) of any successful makeup routine. Skipping these steps can result in patchy, short-lived makeup regardless of your skill level.
Section 2: Foundation—Shade Selection and Application
Choosing the Right Foundation Shade
Finding your perfect match is crucial. The wrong shade or undertone can leave you looking ashy, orange, or mask-like. Test foundation along your jawline—not your wrist or hand—for the most accurate match. Observe the color in natural daylight; the ideal shade should disappear seamlessly into your skin.
Don’t forget undertones: cool (pink, red, or blue), warm (yellow, peach, golden), or neutral (a mix). Many brands now offer extensive shade ranges and undertones, making it easier to find your match. If you’re unsure, AI-powered tools like Makeup Check AI can scan your face, analyze your skin tone, and recommend your best shades instantly.
Foundation Formulas and Tools
Choose your formula based on your skin type and desired finish:
- Liquid: Versatile, buildable coverage; works with most skin types.
- Cream: Offers higher coverage and a dewy finish; ideal for dry or mature skin.
- Powder: Best for oily skin or quick fixes; provides a matte finish.
- Stick: Great for spot coverage and on-the-go touch-ups.
Application tools matter too. Brushes give a polished, airbrushed look; sponges provide a natural, seamless blend; fingers warm up the product for lighter coverage. Try each to see what suits you best.
How to Apply Foundation Evenly
- Start with a small amount, building coverage as needed.
- Begin at the center of your face (nose, cheeks, chin) and blend outward to avoid harsh edges.
- Use gentle tapping or stippling motions—never drag across the skin.
- Blend into the hairline, jaw, and ears for an undetectable finish.
Foundation sets the stage for all other face makeup steps. Take your time to perfect this layer—it’s easier to add than to remove excess product.
Section 3: Concealer Placement for a Flawless Canvas
When to Apply Concealer: Before or After Foundation?
The classic question: concealer before or after foundation? For most, apply foundation first, then use concealer only where needed. This prevents unnecessary product buildup and lets you see what foundation already covers. The exception: use color-correcting concealers (like green for redness, peach for dark circles) before foundation, then top with regular concealer after.
Targeted Concealer Placement
Use concealer to address specific concerns:
- Under Eyes: Apply in a triangle shape from the inner corner down toward the cheek and up to the outer eye. Blend gently with a damp sponge or brush.
- Blemishes: Dab directly onto spots and blend the edges only. Use a shade that matches your foundation exactly.
- Redness: Target the sides of the nose, chin, or any red patches.
- Highlighting: For extra brightness, use a concealer one shade lighter on the center of the forehead, bridge of the nose, and chin.
Blending and Setting
Blending is key to a natural finish. Use a tapping motion with your finger or a small brush—avoid swiping, which moves product around. Set with a light dusting of translucent powder to prevent creasing, especially under the eyes.
For a truly personalized routine, apps like Makeup Check AI can assess your face shape and coloration, then guide you step-by-step with interactive tutorials on where to place concealer for your unique needs.
Section 4: Setting Your Base With Powder and Spray
Why Set Your Makeup?
Setting your face makeup locks in foundation and concealer, controls shine, and extends wear. Without it, your base can slide, crease, or fade throughout the day—especially in humid or oily environments.
Types of Setting Powders
- Loose Translucent Powder: Lightweight, invisible finish; ideal for setting under-eye concealer and T-zone.
- Pressed Powder: Portable and great for touch-ups; can offer a bit of extra coverage.
- Tinted Setting Powder: Adds subtle color and extra evening out—best for when you want more coverage.
Apply powder with a fluffy brush or powder puff. Press (don’t rub) the product into the skin for a seamless look. Focus on areas prone to oiliness—forehead, nose, chin—and under the eyes to prevent creasing.
Setting Sprays for Longevity
Finish your base with a setting spray for an extra layer of longevity and a natural skin-like finish. Spritz 2–3 times in an “X” and “T” motion over your face. Different sprays offer different benefits: mattifying for oily skin, dewy for dry, or hydrating for a natural glow.
- Use powder sparingly to avoid a cakey appearance.
- Allow the spray to dry completely before touching your face.
- Carry blotting papers for on-the-go shine control.
Well-set makeup not only lasts longer but also looks more polished. For more on the latest in makeup setting and longevity, see our guide on how AI is transforming beauty routines.
Section 5: Adding Dimension—Blush, Bronzer, Contour, and Highlighter
Understanding Each Product’s Purpose
- Bronzer: Adds warmth and mimics a sun-kissed glow. Sweep along the hairline, under cheekbones, and jawline.
- Contour: Creates depth and sculpts facial features. Apply in the hollows of the cheeks, sides of the nose, and jawline for definition.
- Blush: Lifts and adds a healthy flush. Smile and apply to the apples of the cheeks, blending back toward the temples.
- Highlighter: Brings light to high points—tops of cheekbones, brow bones, bridge of nose, cupid’s bow.
Each product serves a unique function, but together they create a three-dimensional, balanced look.
Placement Techniques for Every Face Shape
Face shape influences where you’ll place each product. Oval faces may apply blush higher for lift, while round faces can contour below cheekbones for definition. Use a light hand—build pigment gradually and blend thoroughly for natural results.
- Use matte powders for contouring; shimmery products are best reserved for highlighting.
- Cream formulas offer a dewy finish but require more blending; powders are easier for beginners.
- Don’t overdo it—subtlety is key to a modern, wearable look.
AI and Virtual Try-On for Dimension Products
Struggling with placement or unsure what suits your features? Advanced apps like Makeup Check AI let you scan your face, then virtually try on different blush, contour, bronzer, and highlight placements. This visual feedback improves your technique and helps you find the most flattering look for your bone structure. For an in-depth look at how virtual try-ons work, explore this guide to AR beauty try-on.
Section 6: Brows, Eye Makeup, and Lips—Finishing Touches
Brows: The Face’s Frame
Well-groomed brows balance your features and anchor your face makeup. Start by brushing brow hairs up with a spoolie, then fill sparse areas with a pencil, powder, or pomade. Use short, hair-like strokes and blend with the spoolie for a natural finish. Set with clear or tinted brow gel.
Eye Makeup Order and Essentials
Eye makeup typically follows the base. Start with eyeshadow primer if you have oily lids or want extra longevity. Then:
- Apply eyeshadow—lighter tones on the lid, deeper in the crease and outer corner.
- Follow with eyeliner along the lash line for definition.
- Finish with mascara to open up the eyes.
For bolder looks or if you’re concerned about fallout, you can do eyes first and clean up before foundation. Otherwise, follow the classic order for a seamless transition.
Lips: The Final Step
Prep lips with balm, then outline with lip liner to prevent feathering. Fill with lipstick or gloss, blot, and reapply if you want extra staying power. Nude shades complement most looks, while bold colors make a statement. For inspiration on trending lip looks or to virtually try them on, AI makeup apps offer instant previews tailored to your complexion.
- Keep cotton swabs handy for quick fixes.
- Coordinate lip and cheek tones for harmony.
- Finish with a final spritz of setting spray for ultimate hold.
Conclusion
Perfecting your face makeup step-by-step transforms your beauty routine from guesswork into artistry. Each stage—skin prep, foundation, concealer, setting, adding dimension, and finishing touches—plays a unique role in achieving a polished, long-lasting look. With the rise of AI makeup tools, getting personalized advice and trying new looks is easier than ever. Whether you’re a beginner or a beauty pro, platforms like Makeup Check AI provide tailored tutorials, look generation, and real-time feedback to help you master every technique. Explore more about how smart technology is revolutionizing beauty in our article on the future of AI makeup. Your complete, flawless face makeup routine is just a step away.
FAQ
Q: What is the correct order to apply face makeup step by step?
A: The ideal order is: cleanse, moisturize, sunscreen, primer, foundation, concealer, setting powder, blush/bronzer/contour/highlighter, brows, eye makeup (eyeshadow, eyeliner, mascara), and finally lips. This ensures each product layers correctly for the best results.
Q: Do you put on concealer before or after foundation?
A: Apply concealer after foundation so you only use it where extra coverage is needed. The only exception is color-correcting concealers, which can be used before foundation as a targeted base.
Q: How do you choose the right foundation shade for your face?
A: Test foundation on your jawline in natural light—the perfect shade should disappear into your skin. Consider your undertone (cool, warm, or neutral). Tools like Makeup Check AI can analyze your skin and recommend the best shades for you.
Q: What is the difference between bronzer, contour, blush, and highlighter?
A: Bronzer adds warmth for a sun-kissed look. Contour sculpts and defines facial features. Blush gives a healthy flush to the cheeks. Highlighter brings light and glow to the high points of your face.
Q: Should you use primer before foundation?
A: Yes, primer should be applied after moisturizer and before foundation. It smooths texture, fills pores, and helps makeup last longer.
Q: How do you make face makeup last all day?
A: Prep skin well, use primer, choose long-wear formulas, set with powder, and finish with setting spray. Carry blotting papers and touch up as needed for all-day perfection.
Una comparación ordenada puede empezar por el corte, la transpiración del tejido y las instrucciones de cuidado. Si la búsqueda se centra en una figura concreta, camisetas para aficionados de Lionel Messi conserva esa referencia sin mezclar equipos o selecciones. También conviene revisar las condiciones descritas para evitar confundir estilo, talla y comodidad.