Upcycle Makeup Containers: Creative DIY Beauty & Sustainability Projects
Discover creative ways to upcycle makeup containers and embrace sustainability with DIY beauty projects that transform waste into stylish value.
Approximately 10-minute read
Key Takeaways
- Upcycling makeup containers transforms waste into functional pieces, reducing landfill and plastic production.
- DIY projects boost creativity and personal style while fostering mindful consumption.
- Simple tools and materials can turn everyday beauty packaging into organizers, planters, and more.
- Joining a sustainability community encourages sharing ideas and inspiring new projects.
Table of Contents
- Section 1: Understanding Upcycling
- Section 2: The Sustainability Angle
- Section 3: Getting Started with DIY Projects
- Section 4: Step-by-Step Guides to Creative Projects
- Personalization Tips
- Section 5: Creative Inspiration and Variations
- Section 6: Troubleshooting
- Section 7: Conclusion & Call to Action
- FAQ
Section 1: Understanding Upcycling
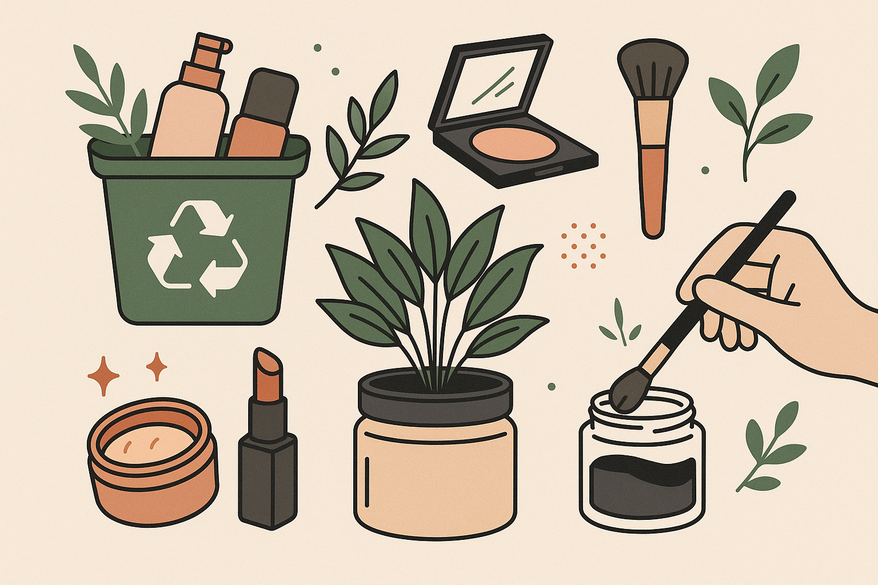
Upcycling transforms unwanted items into products of higher value without breaking down the materials. When you upcycle makeup containers, you preserve the container’s integrity and give it a fresh purpose.
- Definition: Directly reuse a product with added value (e.g., repurposed compact becomes a ring dish).
- Upcycling vs. Recycling:
- Upcycling retains original form and enhances value.
- Recycling breaks down plastics and fibers, often losing quality.
- Role in beauty and DIY:
- Lowers demand for new container production.
- Sparks creativity in daily routines.
- Encourages mindful consumption and resource reduction.
“A small beauty boutique in Chicago upcycles expired sample jars into custom candle holders, saving over 200 containers each month.”
Section 2: The Sustainability Angle
Upcycling beauty containers makes a direct dent in plastic pollution and supports the circular economy.
Environmental Impact
- Plastic waste: Only about 9% of plastic ever made is recycled; cosmetic plastics (#3 and #7) often aren't curbside-eligible.
- Landfill reduction: Giving a lipstick tube a second life saves it from a single-use fate.
Resource Savings
- Carbon footprint: Manufacturing new plastic emits CO₂—upcycling cuts emissions by reducing demand for virgin materials.
- Energy savings: Less energy is spent on shredding and reprocessing when you repurpose intact containers.
Circular Economy Benefit
- Continuous reuse: Turn a jar into a tealight holder, then a desk organizer to keep materials in play.
- Conscious purchasing: When you upcycle, you value packaging beyond its first life and choose eco-friendly brands.
For detailed disposal and recycling practices, see:
Section 3: Getting Started with DIY Projects
Before diving into craft time, gather your supplies and follow safety basics.
Materials & Tools Needed
- Cleaning supplies:
- Dish soap and warm water
- Rubbing alcohol for stubborn residue
- Old toothbrush or cotton swabs
- Paint and finish:
- Non-toxic acrylic or chalk paint
- Spray primer or sealant for plastic
- Adhesives and decor:
- Hot glue gun or clear craft glue
- Washi tape, stickers, fabric scraps, decorative paper
- Cutting & shaping tools:
- Scissors, small screwdrivers, utility knife
- Fine sandpaper (180–220 grit)
- Protective gear:
- Disposable gloves and mask (for paints and solvents)
Safety Tips
- Clean containers thoroughly to remove makeup bacteria; wear gloves if you have sensitive skin.
- Work in a well-ventilated area, especially with spray paints or adhesives.
- Use food-safe containers only for edible or personal-care storage—check manufacturer markings.
Section 4: Step-by-Step Guides to Creative Projects
Here are three beginner-friendly DIYs to repurpose your empty containers.
4.1 Transforming Makeup Compacts into Mini Organizers
- Clean and Dry
- Wash compact with warm, soapy water and scrub nooks with a toothbrush.
- Rinse and air dry completely.
- Remove Hardware
- Use a flat-head screwdriver to pop out the mirror or hinges.
- Discard leftover powder or cream residues.
- Sand and Paint
- Lightly sand edges to help paint adhere.
- Apply a spray primer, then two coats of acrylic paint; let dry 24 hours.
- Seal with a clear coat.
- Customize Interior
- Line the base with felt or decorative paper.
- Add small compartments with cardboard dividers.
- Use as Storage
- Hold rings, earrings, bobby pins, paper clips, or miniature cosmetics.
Time estimate: 1–2 hours (including drying).
4.2 Converting Lipstick Tubes into Small Storage Holders
- Extract and Clean
- Push lipstick fully up and scrape out wax with a small spatula.
- Disassemble tube if possible and wipe inside with rubbing alcohol.
- Decorate Exterior
- Wrap tube in colorful washi tape or paint with metallic acrylic.
- Seal with clear glue or finishing spray.
- Functional Fillers
- Use for travel-size cotton swabs, toothpicks, matches, or bobby pins.
Time estimate: 30–45 minutes.
4.3 Repurposing Mascara Containers as Seed Starters or Planters
- Disassemble and Clean
- Remove wand and cap.
- Rinse tube interior with soapy water using a brush or cotton swab.
- Prepare Drainage
- Heat a needle and puncture a small hole at the bottom for runoff.
- Potting Mix and Planting
- Fill tube half-full with seed-starting mix.
- Sow herb seeds or insert a succulent cutting.
- Label with washi tape or a paint marker.
- Care Instructions
- Water sparingly—small volume dries quickly.
- Place on a saucer to catch drips.
Time estimate: 15–20 minutes.
Personalization Tips
- Paint geometric patterns or metallic stripes for a luxe look.
- Glue ribbon, twine, or fabric rosettes for added texture.
- Salvage pumps and sprays from old bottles to create travel misters and rollers.
Section 5: Creative Inspiration and Variations
- Tea-Light Holders from Skincare Jars
- Remove labels and paint jars in pastel hues.
- Place a small candle inside for ambient lighting.
- Modular Desk Organizer
- Glue several compacts or tubes onto a wooden board.
- Paint the board to match your desk.
- Bath Scrub Tubs
- Use larger cream tubs for homemade sugar or salt scrubs.
- Label with waterproof stickers.
- Composite Home Décor
- Combine plastic containers with recycled glass or wood pieces.
- Create candleholders, trinket trays, or wall art.
Section 6: Troubleshooting
- Stubborn residue:
- Apply oil-based makeup remover or baking soda paste.
- Scrub with a toothbrush until all pigment lifts off.
- Label removal:
- Soak in warm, soapy water for 15 minutes.
- Rub off adhesive with citrus solvent or rubbing alcohol.
- Material safety:
- Avoid containers that held strong solvents or nail polish removers.
- Always sanitize before using for food, plants, or personal care.
Section 7: Conclusion & Call to Action
Upcycle makeup containers offers a simple, creative way to cut waste and conserve resources. These DIY projects build skills in crafting, design, and eco-friendly living.
Plus, you can reduce physical waste by using virtual makeup tools like Makeup Check AI, which lets you experiment with looks without buying extra products.
Get started today:
- Upcycle one container this week—post your before/after on Instagram.
- Tag your photos with
#UpcycleBeautyto join our sustainability community. - Leave a comment below with your project success or questions.
Together, we can spark a circular beauty movement—one compact, tube, and jar at a time.
FAQ
- Can all beauty packaging be upcycled?
- Most containers can be repurposed, but plastics labeled
#3(PVC) and#7(mixed plastics) may be harder to clean. - How do I remove lingering odors?
- Soak containers overnight in a mixture of vinegar and water or sprinkle baking soda inside and let air dry in the sun.
- Is it safe to use recycled makeup jars for edible items?
- Only if the plastic is food-grade and you've thoroughly sanitized with hot, soapy water and alcohol.