How to Clean Makeup Brushes: A Complete Guide to Hygiene and Maintenance
Learn how to clean makeup brushes with DIY recipes, disinfection methods, and storage tips to keep your tools hygienic and long-lasting.

Estimated reading time: 8 minutes
Key Takeaways
- Regular cleaning prevents breakouts and extends brush life.
- Follow our step-by-step method for deep-cleaning your brushes.
- Explore DIY brush cleaner recipes using household items.
- Learn the optimal sponge washing schedule and drying tips.
- Master proper disinfection methods and storage best practices.
Table of Contents
- Understanding the Importance of Regular Cleaning
- Detailed Guide – How to Clean Makeup Brushes
- Brush Cleaner DIY
- How Often to Wash Sponges
- How to Disinfect Beauty Tools
- How to Store Brushes Properly
- Conclusion
- FAQ
Understanding the Importance of Regular Cleaning
Defining Key Terms
- Bacteria buildup: accumulation of microbes (E. coli, staph) on makeup tools that can transfer to skin.
- Skin hygiene: daily practices that prevent infections, breakouts, and irritation.
Risks of Unclean Tools
Unwashed brushes and sponges become breeding grounds for bacteria, oil, and dead skin cells—leading to:
- Acne and breakouts
- Skin irritation and redness
- Infections (folliculitis, staph)
- Clogged pores and uneven makeup finish
“Unwashed brushes breed bacteria, dirt, and oils leading to infections, acne, irritation.” – American Academy of Dermatology
“Dirty brushes can cause severe skin conditions and clogged pores.” – Nanshy
For more on essential hygiene tips for healthy skin.
Preserving Brush Quality
- Keeps bristles soft and flexible
- Prevents shedding and bristle breakage
- Extends brush lifespan and performance
Detailed Guide – How to Clean Makeup Brushes
Tools & Products Needed
- Lukewarm water (32–38 °C / 90–100 °F). Avoid hot water to protect ferrule glue.
- Gentle, fragrance-free shampoo, pH-neutral brush cleanser, or a sulfate-free liquid soap. In 2026, eco-friendly solid brush cleansers are also widely available (average price: $8–$16 USD).
- 100% cotton towel or microfiber cloth for blotting.
- Optional: silicone brush-cleaning mat or glove for deeper agitation (widely available as of 2026, $5–$15 USD).
Step-by-Step Instructions
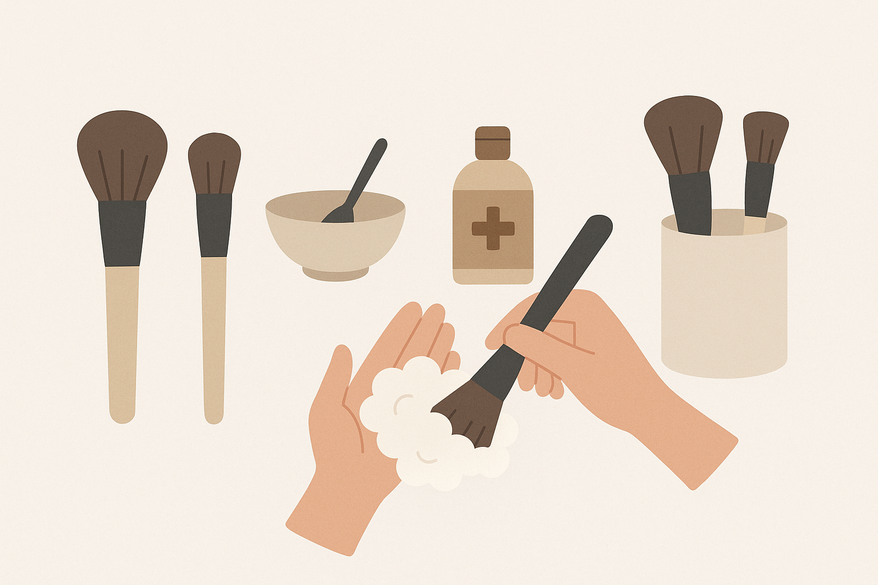
- Rinse bristles under lukewarm running water. Tilt brush downward to avoid water soaking handle and ferrule.
- Dispense a dime-size amount of cleanser onto your palm, cleaning mat, or solid cleanser puck.
- Gently swirl bristles in cleanser, working from base to tip until pigment and debris lift. For stubborn residue, repeat with fresh cleanser.
- Rinse under running water until water runs completely clear, gently separating bristles with fingers.
- Squeeze out excess moisture with a clean towel or microfiber cloth.
- Reshape bristles and lay brushes flat with bristles hanging over the edge of a counter for optimal air circulation. (In 2026, stackable drying racks are popular for home users.)
Tip: For dense, kabuki, or angled brushes, repeat lather and rinse steps until all product is removed. Use a silicone mat for extra agitation if needed.
Source for drying technique.
Best Practices & Common Mistakes
- Do not soak handles or ferrules—they can loosen glue bonds and cause shedding.
- Never dry brushes upright; water can seep into the ferrule and compromise the structure.
- Avoid harsh detergents, acetone, or alcohol on natural-fiber brushes; they strip oils and make bristles brittle.
- Clean brushes at least once a week; for brushes used with liquid/cream products or around the eyes/lips, clean after each use if possible.
- Replace brushes showing persistent shedding, misshapen bristles, or stubborn residue that won’t wash out.
Source: American Academy of Dermatology routine.
Brush Cleaner DIY
Homemade cleaners save money, cut chemicals, and reduce waste. In 2026, many users prefer DIY to avoid unnecessary fragrances and packaging. Here are proven recipes:
Recipe 1: Olive Oil & Dish Soap
- Mix 2 parts gentle, unscented dish soap + 1 part extra-virgin olive oil in a small bowl.
- Swirl the brush to blend. Soap removes makeup; oil conditions natural bristles. Rinse thoroughly to avoid residue.
Recipe 2: Baby Shampoo Mix
- Dilute 1 teaspoon baby shampoo (paraben-free, fragrance-free preferred) with 2 tablespoons warm water.
- This pH-balanced solution cleans gently without drying out bristles. Rinse well.
Recipe 3: Vinegar Disinfecting Solution
- Combine 1 part white vinegar + 2 parts water.
- Soak bristles for 1–2 minutes. Rinse thoroughly to eliminate vinegar smell. Do not soak handles.
Pros & Cons
DIY:
– Pros: Affordable, customizable, eco-friendly, reduces single-use plastic.
– Cons: Extra rinsing needed, some odors, less rapid drying.
Commercial:
– Pros: Fast-drying, pre-measured, effective disinfection, many now offer refillable options (2026 trend).
– Cons: More expensive, may contain fragrances or harsh chemicals, packaging waste if not refillable.
How Often to Wash Sponges
Makeup sponges are porous and trap moisture, creating ideal conditions for bacterial growth. In 2026, dermatologists and major brands agree: sponges require more frequent cleaning than brushes.
Washing Frequency
- After Every Use: Quick daily rinse under lukewarm water + mild soap or dedicated sponge cleanser. Squeeze until water runs clear.
- Weekly Deep Clean: Fully submerge sponge in cleanser solution for 5–10 minutes, then rinse thoroughly. Use a mesh laundry bag if machine washing (new in 2026: several brands now offer machine-washable sponges).
Sponges absorb more product and moisture—cleaning sponges is more critical than cleaning brushes. Quick daily rinses reduce surface oils; weekly cleans remove deeper grime. Never leave a damp sponge in a closed container.
Drying & Replacement:
– Gently squeeze out water without twisting to avoid tears.
– Lay sponges on a clean towel in a well-ventilated spot; avoid closed, humid spaces.
– Replace sponges every 3 months, or sooner if you notice cracks, tears, persistent stains, or mold. Some 2026 sponges have color-change technology to indicate when it’s time to replace.
See also the applicator debate.
How to Disinfect Beauty Tools
Method A: Isopropyl Alcohol Spray
- Use 70% isopropyl alcohol in a spray bottle (available at most drugstores in 2026, $2–$5 USD).
- Lightly mist brush bristles or sponge surface. For quick disinfection between clients or uses, this is the pro standard.
- Let air-dry completely before next use. Alcohol evaporates quickly and kills most surface bacteria.
Method B: Soaking in Vinegar/Alcohol Solution
- For deeper disinfection, mix:
• 1 part isopropyl alcohol : 1 part water
OR
• 1 part white vinegar : 2 parts water - Submerge bristles for 1–2 minutes. Rinse thoroughly and dry flat. Do not soak handles.
Safety Precautions
- Never use undiluted bleach or strong acids; they damage bristles and may irritate skin.
- Do not submerge handles or ferrules—liquid can cause swelling or loosening.
- Work in a ventilated area to avoid inhaling fumes from alcohol or vinegar.
- Allow tools to dry fully before storing to prevent mold growth.
How to Store Brushes Properly
Best Practices
- Store brushes upright in a clean cup, stand, or modular holder—bristles exposed to air reduce mold risk.
- Ensure brushes and sponges are completely dry before storing to avoid mildew.
- Use mesh brush guards or ventilated travel cases to protect bristle shape on the go.
- Avoid closed, damp environments (e.g., humid bathrooms or sealed makeup bags). In 2026, antimicrobial holders are available for extra protection.
Extra Tips
- Label holders by brush type for quick access.
- Clean your brush holder monthly to avoid transferring dirt back to fingertips or tools.
- For short or travel-friendly sets, use a roll-up brush pouch or hard-shell case with individual slots.
- If storing for extended periods, consider a dust cover or breathable pouch.
Conclusion
Maintaining clean brushes and sponges is essential for healthy skin and tool longevity. By mastering these routines—from how to clean makeup brushes and experimenting with DIY cleaners, to washing sponges at the right frequency, disinfecting tools properly, and storing brushes correctly—you ensure every application is smooth, safe, and bacteria-free. Embrace these steps to protect your skin, preserve your brushes, and elevate your makeup game in 2026 and beyond.
FAQ
- How often should I clean my makeup brushes?
Clean face brushes weekly and eye or lip brushes after every use to prevent bacteria buildup. If you use cream or liquid products, consider cleaning after each use. - Can I use dish soap on natural-fiber brushes?
Yes—mix dish soap with olive oil to condition bristles while cleansing. Always rinse thoroughly to remove all residue. - What’s the best way to dry brushes?
Reshape bristles and lay brushes flat with the tips hanging off a counter edge or use a brush drying rack for optimal airflow. - How do I know when to replace a sponge?
Replace every 3 months or sooner if it shows cracks, tears, persistent stains, or mold. Some 2026 sponges have color indicators for replacement. - Is it safe to disinfect with alcohol?
Use 70% isopropyl alcohol diluted appropriately and avoid oversaturation of handles and ferrules. Always allow to air-dry fully before use or storage.