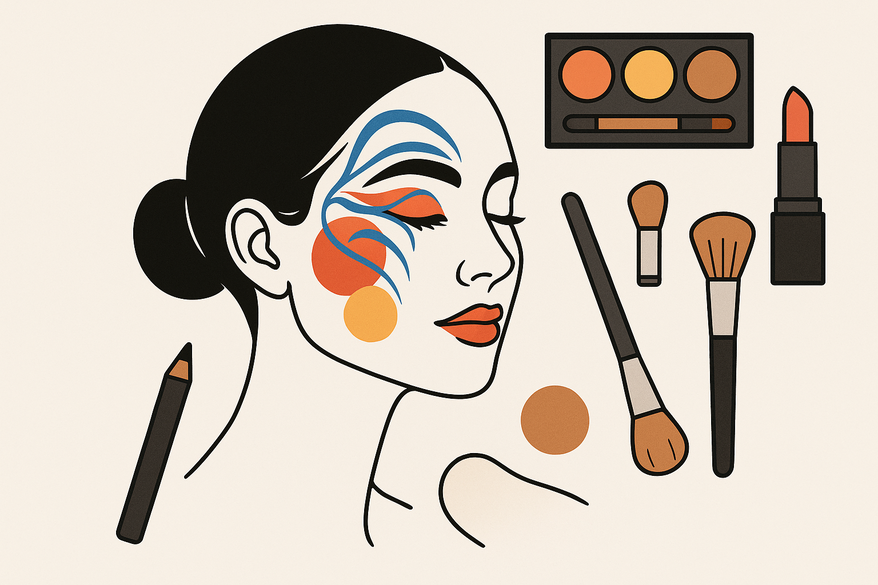
Creative Makeup Designs: The Ultimate Guide to Transforming Your Face into Art
Explore creative makeup designs to turn your face into a canvas of artistry. Discover trends, tools, and techniques in this ultimate guide to makeup artistry.
Estimated reading time: 13 minutes
Key Takeaways
- Creative makeup designs turn the face into a living canvas using bold colors, graphic liners, abstract art, and 3D embellishments.
- Seasonal motifs and cultural influences—from pastel blossoms to Dia de los Muertos—shape color palettes and patterns.
- Essential tools include precision brushes, high-pigment products, cosmetic-grade adhesives, and unconventional materials like gold leaf.
- Step-by-step tutorials cover beginner to advanced techniques: color blocking, stencil usage, freehand illustrations, and prosthetic basics.
- Best practices emphasize safety (patch tests), hygiene (sanitizing tools), troubleshooting (smudging fixes), and cultural sensitivity.
Table of Contents
- Current Trends in Creative Makeup Designs
- Tools, Products, and Techniques for Creative Makeup Designs
- Step-by-Step Tutorials and Ideas for Creative Makeup Designs
- Inspiration and Sources for Creative Makeup Designs
- Tips, Tricks, and Best Practices for Creative Makeup Designs
- Conclusion
Current Trends in Creative Makeup Designs
1.1 Popular Trends in Creative Makeup Designs
- Bold colors
– Technical definition: use of neon pigments and high-intensity pressed or loose eyeshadows for maximum contrast.
– Example: Electric-blue lids paired with hot-pink lower lash lines at New York Fashion Week.
– Technique tip: Apply a white cream base first to intensify neon payoff. - Graphic liner
– Definition: precise geometric shapes, double wings, floating lines, and negative-space cutouts.
– Example: Triangular cut-crease liners seen on runway models.
– Tool advice: Detailer brushes (size 0 or 000) and long-wear gel liners yield crisp edges. - Abstract art
– Definition: asymmetrical patterns, splash techniques, and modern-art-inspired shapes.
– Example: Brushstroke textures mimicking Jackson Pollock splatters across lids and cheeks.
– Pro tip: Use fan or flat brushes to simulate painterly strokes. - Textural elements
– Definition: 3D accents including cosmetic-grade glitter, rhinestones, metallic foils, and appliqués.
– Example: Clustered micro-crystals around the brow bone for editorial shoots.
– Durability tip: Opt for medical-grade adhesive and seal with setting spray. - Pop culture & fantasy motifs
– Definition: designs inspired by comic-book color-blocking, mythical creatures, and cinematic characters.
– Example: Dragon-scale foil accents or superhero-inspired color blocking on lids.
– Sourcing tip: Look for small fan communities and costume makeup suppliers for custom colors.
1.2 Seasonal and Cultural Influences in Creative Makeup Designs
- Spring/Summer motifs
– Pastel florals and watercolor blends reflect blooming landscapes.
– Dewy highlights: layer cream illuminators over powder highlighter for a luminous finish.
– Pro tip: Use a damp sponge to press pearl pigments onto high points for fresh, beachy radiance. - Autumn/Winter themes
– Jewel tones (emerald, sapphire, amethyst) and smoky metallics lean into rich seasonal hues.
– Technique: Wet brush application boosts powder pigment for intense, saturated color.
– Trend observation: Matte-to-gloss gradients on lips and lids mimic roasted chestnut and candlelight. - Cultural references
– Festivals like Holi inspire riotous color palettes and powder-crushed blends.
– Dia de los Muertos brings skeletal motifs, floral crowns, and face-paint symmetry.
– Respectful sourcing: Research traditional motifs, credit origins, and adapt with cultural sensitivity.
Tools, Products, and Techniques for Creative Makeup Designs
2.1 Essential Tools & Products
- Precision brushes
– Flat shader brushes: pack color densely on lids.
– Fine-tip liner brushes: draw crisp wings and geometric lines.
– Synthetic vs. natural: synthetics repel liquid products; natural bristles pick up powders well. - High-pigment eyeshadows & loose pigments
– Pigment load: look for >0.5% pigment weight for bold payoff.
– Blendability: softer-milled formulations layer more smoothly. - Cream products vs. powders
– Texture impact: creams offer a dewy, blendable base; powders deliver longevity and setability.
– Layering guide: sandwich cream and powder to prevent creasing and fallout. - Highlighters & sculpting palettes
– Placement maps: cheekbones, brow arch, cupid’s bow for targeted dimension.
– Product types: pressed pigments, cream sticks, baked powders. - Cosmetic-grade adhesives & embellishments
– Gem types: acrylic rhinestones, micro-crystals, metallic leaf.
– Safety standards: choose adhesives labeled “dermatologist-tested” or “cosmetic-grade.”
– Removal protocols: use oil-based cleansers to dissolve glues without skin irritation.
2.2 Innovative Techniques
- Sandwich layer method
1. Apply a cream color base.
2. Dust a matching powder shadow on top to lock pigment and reduce fallout. - Stencil usage
– Creating custom stencils: use acetate sheets and sharp blades to cut shapes.
– Application trick: hold stencil firmly against skin, apply pigment with tapping motions. - Unconventional materials
– Gold leaf: press with damp detail brush; seal edges with translucent powder.
– Fabric scraps: micro-weave tulle or silk appliqués adhere with lash glue. - Prosthetic makeup basics
– Foam latex pieces: pre-soften in water, sculpt edges with a thin layer of alcohol-activated palette.
– Blending edges: use a sponge and alcohol to feather prosthetic into skin seamlessly.
Step-by-Step Tutorials and Ideas for Creative Makeup Designs
3.1 Beginner-Friendly Tutorial
- Prep
– Cleanse with gentle gel or foam cleanser.
– Moisturize: choose a non-comedogenic lotion for oily skin or rich cream for dry skin.
– Prime: silicone-based primers fill fine lines; water-based primers suit hydrating finishes. - Base
– Foundation: match undertone (cool, neutral, warm).
– Concealer: use a shade one tone lighter under eyes for a brightening effect.
– Blend: buff with a dense brush or stipple with a damp sponge for airbrushed coverage. - Design sketching
– Lightly map shapes using a white eyeliner or brow pencil.
– Mirror-symmetry tip: draw one side, then use tracing paper or medical tape to transfer. - Color blocking
– Mid-tone first: apply medium shade across target area.
– Dark accents: define edges or creases with deeper pigment.
– Light highlights: place on high points and blend gently. - Detailing
– Ultra-fine liner: use a 000 brush or precision pen for graphic edges.
– Brush sizes: liner brush for thin lines, angled brush for sharp wings. - Embellishments
– Gems: press cosmetic rhinestones into lash glue.
– Glitter: use a tacky gel base, then gently press chunky and micro-glitters on top. - Finishing
– Setting spray: choose matte for longevity or dewy for a fresh sheen.
– Layering: mist twice—once close up to settle pigment, once from distance to lock it in. - Troubleshooting
– Smudges: lightly dab with a cotton swab dipped in micellar water.
– Uneven lines: use a matching eyeshadow to mask errors, then redraw.
3.2 Advanced Techniques for Experienced Users
- Freehand miniature illustrations
– Use high-pigment, ink-like liners or gel liners for detailed motifs (e.g., tiny florals, script).
– Brush pressure control: practice stroke thickness on a face chart before live application. - Complex gradients
– Wet-on-wet watercolor blending: dampen brush, pull pigment across lids for seamless ombrés.
– Dry powder layering: build color stops—start dark at the root, fade to light at brow.
– Shading map: sketch three gradient zones, then blend overlapping edges. - 3D attachments & prosthetics
– Pre-molding: heat foam latex in warm water, shape to facial contours.
– Skin-safe adhesives: medical-grade pros-aide or spirit gum.
– Color match: mix alcohol-activated palette tones to mimic natural skin before blending edges. - Case Study: Abstract Floral Eye Design
1. Map five petal outlines around the orbital bone in pale pencil.
2. Fill each petal with vibrant shades—layer coral mid-tones, blend yellow highlights at centers.
3. Outline petals with thin black liner, adding curvature for realism.
4. Place micro-rhinestones at petal tips to simulate dew drops, pressing with tweezers.
5. Seal entire look with a lightweight setting mist.
Inspiration and Sources for Creative Makeup Designs
Key Influencers and Signature Styles
- Pat McGrath (patmcgrath.com)
– Signature: micro-crystal embellishments, ultra-saturated pigment placement, sculptural accents. - Lisa Eldridge (lisaeldridge.com)
– Signature: soft-focus editorial artistry, painterly blends, refined color harmony. - James Molloy (james-molloy.com)
– Signature: theatrical sculpting, avant-garde textures, runway-ready innovation.
Social Platforms & Search Tactics
- Instagram hashtags
– #CreativeMakeupDesigns, #ArtMakeup, #MakeupArtistry—use “Recent” filter to see emerging looks.
– Save collections by theme (e.g., “Abstract Makeup”) to build a personal mood board. - TikTok trend discovery
– Navigate sounds and stitch features to replicate viral makeup challenges.
– Follow makeup artist duets for behind-the-scenes technique breakdowns. - Pinterest boards
– Keyword-driven boards like “Graphic Liner Art” or “Fantasy Makeup” help refine visual searches.
– Download high-res images for color palette extraction and layering ideas.
For more AI-driven visual inspiration, check AI-curated makeup looks.
Tips, Tricks, and Best Practices for Creative Makeup Designs
Dos
- Patch-test all glitters and adhesives at least 24 hours before application to check for allergies.
- Sanitize brushes and sponges between colors and clients; deep-clean weekly with gentle, antimicrobial soap.
- Practice designs on disposable face charts or mannequin heads before live application.
- Use only cosmetic-grade materials with FDA or IFRA certification markers.
Don’ts
- Avoid craft-grade glitters near the eyes; oversized particles can scratch the cornea.
- Never share tubes or pots of eye and lip products to prevent bacterial cross-contamination.
- Do not load skin with thick layers of product; heavy build-up causes creasing and discomfort.
Common Challenges & Solutions
- Asymmetry
– Use medical tape or stencils as guides. Apply half your design, then mirror it using the tape as a pivot. - Smudging
– Set each cream layer with matching powder. Finish with a long-wear setting spray targeting problem areas. - Skin irritation
– Switch to hypoallergenic lines free of fragrance and common irritants.
– Remove makeup gently with oil-based cleansers to avoid harsh rubbing.
Conclusion
Exploring creative makeup designs unlocks a world of artistic expression, enabling both beginners and professionals to craft unique visual narratives. From current trends and essential tools to step-by-step tutorials and cultural inspirations, this guide equips you with the expertise and confidence to innovate. Embrace these techniques, experiment fearlessly, and watch your artistry flourish. Ready to transform your face into a masterpiece? Try one new creative makeup look this week, share your process with #CreativeMakeupDesigns on social media, and join a vibrant community of beauty artists pushing boundaries together.
FAQ
What are the best brushes for graphic liner work?
Use ultra-fine detail brushes (size 0 or 000) made from synthetic fibers paired with a long-wear gel liner for the sharpest, most precise lines.
How can I prevent fallout when working with heavy pigments?
Apply the sandwich layer method: a cream base followed by a matching powder shadow to lock pigment in place and minimize fallout.
Is it safe to use glitter near the eye area?
Only use cosmetic-grade, finely milled glitter labeled for eye use. Perform a patch test and secure glitter with a tacky gel adhesive or eyelash glue.
What’s the best way to remove 3D embellishments?
Gently dissolve adhesives with an oil-based cleanser, then lift gems or appliqués with tweezers. Follow up with a soothing micellar water rinse.