AI Contour Makeup Generator: Step-by-Step Face Sculpting & Highlight Tutorial
Learn contour and highlight step-by-step to master sculpting with an AI makeup generator, achieving flawless and personalized results effortlessly.
Estimated reading time: 8 minutes
Key Takeaways
- Contours sculpt facial shadows while highlights brighten high points.
- Proper tools and blending techniques prevent harsh lines.
- An AI contour makeup generator offers real-time previews to personalize your look and optimize placement for your face shape.
- Step-by-step guidance ensures a seamless, professional finish.
Table of Contents
- Section I: Introduction
- Section II: Purpose of This Tutorial
- Section III: Contouring and Highlighting Basics
- Section IV: Step-by-Step Guide
- Section V: Leveraging an AI Contour Makeup Generator
- Section VI: Tips and Common Mistakes
- Section VII: Visual Aids Recommendations
- Section VIII: Summary and Key Takeaways
- Section IX: Call to Action
Section I: Introduction
Mastering contour and highlight is essential for sculpting your face and enhancing your features. This guide will walk you through contour and highlight step-by-step, showing you how to create dimension with shadows and brightness. You'll also discover how an AI contour makeup generator can scan your face and provide instant, personalized previews for flawless sculpting. Practicing these techniques with AI support helps you avoid common mistakes like harsh lines and uneven blending, making it easier to achieve a natural, radiant look.
Sources:
Section II: Purpose of This Tutorial
This post offers a detailed contour and highlight step-by-step tutorial for both beginners and experienced makeup users. You’ll learn:
- Traditional contouring and highlighting methods
- How to use an AI contour makeup generator for custom, face-specific results
Benefits include:
- Technique mastery and precision
- Soft, natural-looking shadows and highlights
- Personalized visualization before applying products, thanks to AI previews
Section III: Contouring and Highlighting Basics
Definitions
- Contouring uses matte, darker shades to mimic natural shadows.
- Highlighting employs lighter, shimmery products to bring features forward and add glow.
Tools Needed
- Contour product (cream, stick, or powder)
- Highlighter (liquid, cream, or powder)
- Foundation and concealer
- Blending tools (makeup sponge; angled, fluffy, sculpting brushes)
- Translucent setting powder
Best Practices
- Use cool-toned contour shades that resemble real shadows.
- Apply highlighter sparingly to high points like cheekbones and brow bone.
- Blend thoroughly in circular or stippling motions to avoid harsh lines.
Sources:
- Max Factor: How to Contour and Highlight
- YouTube: Contour & Highlight Tutorial
- Glo Skin Beauty: Contour & Highlight for Every Face Shape
Section IV: Step-by-Step Guide: Contour and Highlight
1. Preparation
- Cleanse and moisturize your face.
- Apply a primer suited to your skin type for smooth texture and longer wear.
- Use a foundation that matches your skin tone; blend evenly.
2. Identifying Key Facial Areas
Contour zones:
- Under cheekbones
- Along jawline
- Hairline near temples
- Sides of the nose
Highlight zones:
- Tops of cheekbones
- Bridge of the nose
- Center of the forehead
- Chin and Cupid’s bow
- Under-eye area and brow bone
3. Application Steps
a. Contouring
- Trace under cheekbones from ear toward mouth.
- Apply contour along jawline and hairline.
- Draw slim lines on nose sides for a defined bridge.
b. Highlighting
- Create an inverted triangle under each eye.
- Apply down the nose bridge, center forehead, chin, and above cheekbones.
- Add a small dot above the Cupid’s bow for fuller-looking lips.
4. Blending Techniques
- Use a damp makeup sponge or dense brush.
- Blend contour upward to lift the face.
- Press highlighter into skin with stippling or circular motions.
- Ensure no visible streaks or sharp edges remain.
5. Setting the Look
- Lightly dust translucent setting powder over contoured/highlighted areas.
- Use a small fluffy brush for precision.
- Lock makeup in place to prevent shifting or creasing.
Sources:
- Max Factor: How to Contour and Highlight
- Glo Skin Beauty: Contour & Highlight for Every Face Shape
- YouTube: Contour & Highlight Tutorial
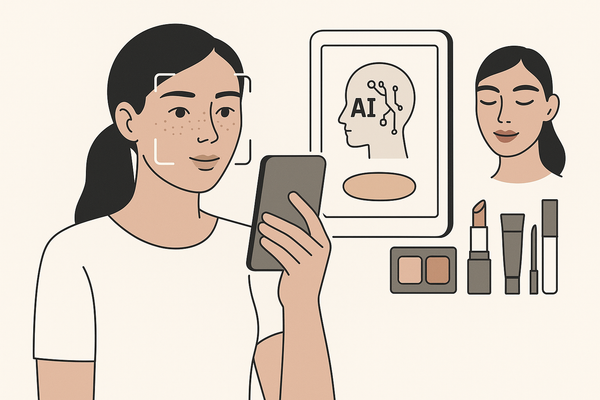
Section V: Leveraging an AI Contour Makeup Generator
How an AI Contour Makeup Generator Works
- Facial mapping and machine learning analyze your bone structure for optimal contour and highlight placement.
- You upload a clear, no-makeup selfie to the app.
- The AI contour makeup generator applies virtual contour and highlight tailored to your face shape and preferences.
Benefits of Using an AI Contour Makeup Generator
- Get instant, realistic previews of sculpted features before you apply any product.
- Receive tailored placement suggestions for your specific bone structure and color season.
- Experiment with over 300+ looks, reducing product waste and saving time compared to trial-and-error methods.
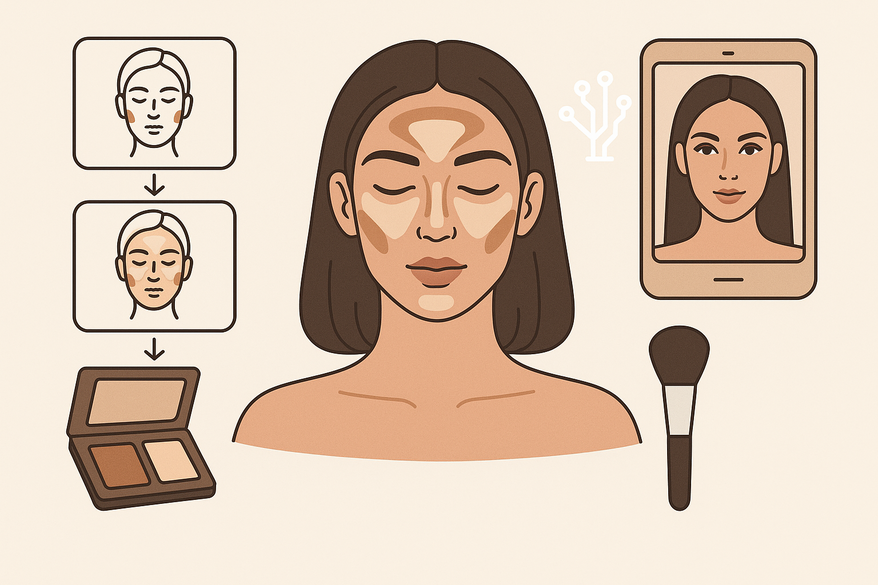
How to Integrate AI into Your Routine:
- Upload a clean, makeup-free selfie to the AI contour makeup generator.
- Select your desired contour and highlight intensity and style.
- Review the AI-generated image to identify the best placement zones for your face.
- Use the preview as a live reference while applying real makeup for a flawless finish.
Traditional vs. AI-Assisted Contouring:
- Personalization: Manual tutorials offer general guidance, while an AI contour makeup generator provides face-specific mapping.
- Visualization: Instead of imagining the result, you get an instant digital preview tailored to you.
- Experimentation: Try different looks virtually, saving money and reducing product waste.
Tools like Makeup Check AI automate placement suggestions and let you preview your contour and highlight in real time. Watch the short guide below to see how this AI contour makeup generator streamlines your sculpting workflow.
For an in-depth AI-assisted contouring approach, see our Face Contouring Tutorial: Master the Art with an AI Makeup Generator. To learn more about AI-driven beauty innovation, check out AI Makeup Coach: Your Guide to the Future of Beauty-Tech & Innovation.
Section VI: Tips and Common Mistakes
Pro Tips
- Feel your bone structure under the skin to locate natural shadows for precise contour placement.
- Start with light strokes; you can always build up color gradually.
- Blend in layers for a seamless, sculpted finish.
- Use your AI contour makeup generator to test new looks before applying them, so you can adjust for your face shape with confidence.
Common Mistakes
- Using shades that are too warm or too dark for your natural tone.
- Skipping or rushing blending, causing visible lines.
- Overloading highlighter, creating an oily rather than glowy look.
- Ignoring AI placement suggestions, which can lead to less flattering results.
Sources:
- Max Factor: How to Contour and Highlight
- YouTube: Contour & Highlight Tutorial
- Glo Skin Beauty: Contour & Highlight for Every Face Shape
Section VII: Visual Aids Recommendations
- Before, during, and after photos for each major step.
- Diagrams showing contour and highlight zones for oval, round, square, and heart-shaped faces.
- Short video clips demonstrating blending motions and tool usage.
Section VIII: Summary and Key Takeaways
- Contouring sculpts, highlighting brightens, and both add dimension to your face.
- A clear, step-by-step routine and the right tools ensure success.
- Blending thoroughly and choosing cool-toned shades for shadows prevents harsh lines.
- Using an AI contour makeup generator offers an innovative way to preview and customize your look before you pick up a brush.
Section IX: Call to Action
Ready to transform your routine? Try this contour and highlight step-by-step tutorial today and experiment with an AI contour makeup generator for personalized guidance. Share your before-and-after photos, experiences, or questions in the comments below. Let’s build a community of sculpting pros!
FAQ
- What is an AI contour makeup generator?
An AI contour makeup generator is a beauty app that uses artificial intelligence to scan your face, map your features, and generate personalized contour and highlight placements for your unique bone structure. - What is the difference between contour and highlight?
Contour creates shadows to define features; highlight adds light to bring features forward. - Can I use cream and powder products together?
Yes, layering cream first and setting with powder can enhance longevity and finish. - How does an AI contour makeup generator benefit me?
It provides a personalized, realistic preview of your sculpted look, saving time and product while boosting confidence in your technique. - What if I see harsh lines?
Use gentle circular motions and a damp sponge or brush to blend seamlessly, and check your AI preview for blending tips. - How often should I practice?
Regular practice, even a few minutes a day, builds muscle memory and blending skills. Using an AI contour makeup generator can help you track your progress and try new styles.