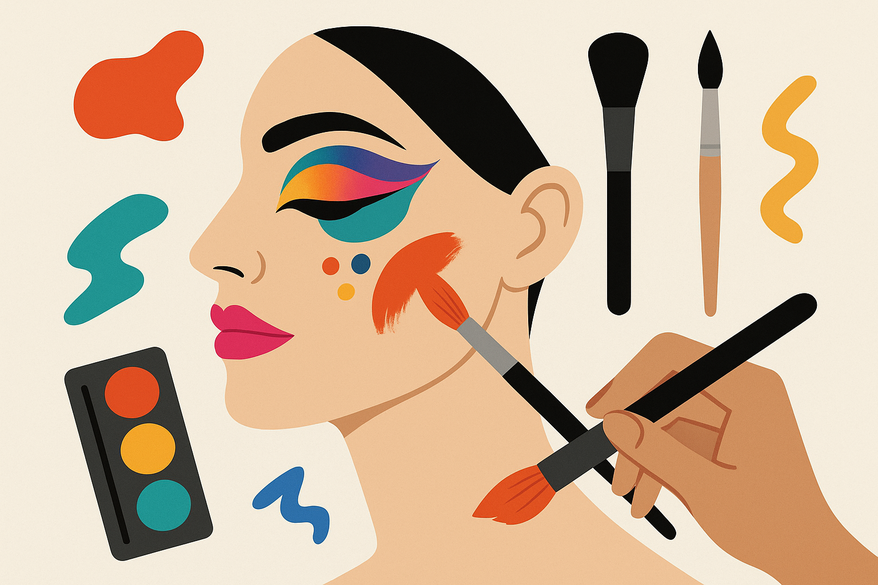
Creative Makeup Designs: An In-Depth Guide for Bold, Artistic Looks
Explore creative makeup designs with bold colors and artistic techniques. Transform your face into a canvas for self-expression with this comprehensive guide.
Estimated reading time: 10 minutes
Key Takeaways
- Creative makeup designs transform the face into a canvas through bold colors, unique textures, and avant-garde flair.
- Master the fundamentals: color theory, face anatomy, product layering, and blending techniques.
- Essential tools include precision brushes, stencils, highly pigmented palettes, and long-wear setting products.
- Techniques such as stenciling, layering textures, and ombré effects elevate your artistic looks.
- Embrace personalization, follow emerging trends, and learn troubleshooting tips to refine your craft.
Table of Contents
- Introduction
- Section 1: Understanding the Basics of Creative Makeup Designs
- Section 2: Essential Tools and Products
- Section 3: Techniques and Step-by-Step Process
- Section 4: Inspirational Ideas and Trends
- Section 5: Customization and Personal Expression
- Section 6: Troubleshooting and Pro Tips
- Conclusion
- FAQ
Creative makeup designs are imaginative, artistic approaches to applying cosmetics that go beyond everyday beauty routines. They use bold colors, unique textures, and avant-garde elements to turn your face into a canvas for self-expression. Simply put, they “transcend conventional beauty routines” and push boundaries of style and identity.
For AI-driven inspiration, see Pushing Beauty Boundaries: Creative Makeup Designs with AI Makeup Generators and Artistic Makeup Inspiration: Unleashing Creativity with AI.
Section 1: Understanding the Basics of Creative Makeup Designs
Foundational principles lay the groundwork for any artistic makeup. Master these basics before attempting complex designs.
Color Theory
- Warm vs. cool hues: Warm (reds, oranges) bring energy; cool (blues, greens) add calm.
- Complementary shades: Opposite colors on the wheel (e.g., blue/orange) create high contrast.
- Triadic palettes: Use three evenly spaced colors (e.g., red-yellow-blue) for balanced, bold looks.
Face Anatomy
- Planes of the face: forehead, cheekbones, jawline.
- Contour: apply darker tones in hollows to sculpt.
- Highlight: place lighter shades on high points (brow bone, cheekbones) to lift features.
Product Layering & Blending
- Opacity vs. translucency: Opaque products give solid color; translucent ones let layers show through.
- Blending: Use small circular strokes or windshield-wiper motions for seamless fades.
Everyday Makeup vs. Creative Makeup Designs
- Everyday makeup
• Natural enhancement
• Neutral palettes
• Subtle contour
• Wearable finishes - Creative makeup designs
• Dramatic shapes
• Experimental color placement
• Unique textures (gloss, glitter, metallic)
• Fine art and theatrical flair
Section 2: Essential Tools and Products for Creative Makeup Designs
Must-Have Tools
- Precision brushes
- Small detail brushes
- Flat shader brushes
- Angled liner brushes
- Blending tools
- Fluffy eyeshadow brushes
- Makeup sponges
- Fan brushes
- Soft gradients
- Light highlighting
- Stencils
- Graphic brow shapes
- Themed motifs and liners
Must-Have Products
- Highly pigmented eyeshadow palettes (matte, shimmer, metallic finishes)
- Cream face paints & multi-use color sticks
- Specialty textures
- Cosmetic glitters
- Metallic pigments
- Rhinestones
- Prosthetic adhesives (for SFX)
- Long-wear setting sprays & translucent powders
- Locks looks in place
- Prevents smudging
For quick AI-based analysis and personalized suggestions, consider experimenting with Makeup Check AI. Its intuitive virtual try-on features let you refine bold, artistic looks with zero guesswork.
Section 3: Techniques and Step-by-Step Process for Creative Makeup Designs
Core Techniques
- Color Blending
- Merge two or more hues with windshield-wiper motions and small circular strokes.
- Creates ombré or halo effects for eye looks.
- Contouring
- Apply darker shades beneath cheekbones, jawline, temples.
- Highlight high points to sculpt or exaggerate anatomy.
- Stenciling
- Place film-grade stencil on skin.
- Pat color over it, then lift for crisp edges.
- Layering Textures
- Start with a matte base.
- Add metallic shadow layers.
- Top with gloss or glitter for multidimensional depth.
Beginner Step-by-Step Guide
- Skin Prep: Cleanse, moisturize, prime.
- Base Application: Foundation and concealer for an even canvas.
- Sketch Design: Use white eyeliner or stencil to outline shapes.
- Block in Base Colors: Use a fluffy brush or sponge; blend edges softly.
- Refine Details: Small detail brushes for crisp lines and shading.
- Add Texture: Press glitter or rhinestones onto a slightly tacky base.
- Set Design: Finish with setting spray or loose translucent powder.
Section 4: Inspirational Ideas and Trends in Creative Makeup Designs
Top 5 Trends for 2025
- Hyper-Realistic SFX & Prosthetic Artistry
- Fantasy creatures, wounds, textures for film and cosplay.
- Source: Top 6 Trends in Makeup Industry 2025
- Cherry & Berry Color Stories
- Deep reds on lids, cheeks, lips for a monochrome look.
- Sources: The Beauty Forecast: Pinterest's Top Trends for 2025 and 6 Makeup Trends 2025 Inspired by Pantone Mocha Mousse
- Aura-Inspired Multi-Color Gradients
- Layer iridescent pigments in rainbow order.
- Sources: The Beauty Forecast: Pinterest's Top Trends for 2025 and 2025–2026 Bold Playful Personal Beauty Trends
- Maximalist Graphic Lids
- Bold liners, metallic cut-creases, abstract shapes.
- Source: 2025–2026 Bold Playful Personal Beauty Trends
- Runway & Influencer Mash-Ups
- Rococo flourishes, dollhouse motifs, deconstructed lip art.
- Source: The Beauty Forecast: Pinterest's Top Trends for 2025
Section 5: Customization and Personal Expression with Creative Makeup Designs
Everyone’s face is a unique canvas. Use these steps to make a look truly yours.
- Personal Style & Technique
- Signature Color Palettes: Pick hues that match your mood or personal brand.
- Unexpected Texture Combos: Pair matte liner with glossy shadow; add metallic pigments next to satin finishes.
- Unique Shapes: Try asymmetrical wings or half-face art; draw inspiration from leaf patterns, tribal marks.
- Sketch & Refine
- Draw your design on paper or a face chart first.
- Experiment with color placement before touching skin.
- Adjust shapes until the design feels true to your vision.
Section 6: Troubleshooting and Pro Tips for Creative Makeup Designs
Common Challenges & Solutions
- Uneven Blending
- Use a clean fan brush to soften harsh lines.
- Build pigment in light layers.
- Glitter Fallout or Patchiness
- Press glitters into a tacky base or glitter glue.
- Tap off excess before pressing on skin.
- Symmetry Issues
- Map key points with a light brow pencil.
- Use a mirror grid, stencil, or small ruler for guides.
Pro Tips for Refinement
- Layer Lightly: Always start with a light hand. Build up color rather than scraping it off.
- Keep Brushes Clean: Rinse brushes between colors to avoid muddying shades.
- Seal Your Design: Use a dew-setting spray for a fresh, long-lasting finish.
- Practice Makes Perfect: Use mannequin heads or face charts to rehearse complex looks.
Conclusion
Creative makeup designs combine solid technique, professional tools, and fearless experimentation to turn your face into a true work of art. As trends evolve—from hyper-realistic SFX to aura-inspired gradients—your imagination is the only limit. We invite you to share your unique projects on social media using the hashtag #MyCreativeMakeupDesigns. Join our community for feedback, tips, and new ideas. Subscribe now for more tutorials, trend updates, and artist spotlights.
FAQ
- What is creative makeup design?
Artistic application of cosmetics using bold colors, textures, and avant-garde techniques to express individuality. - Which tools are essential?
Precision brushes, stencils, blending tools, pigmented palettes, and setting sprays for durability. - How do I prevent glitter fallout?
Press glitters onto a tacky base or glue, then gently tap off excess before pressing into skin. - Can beginners try these looks?
Yes—start simple with stencils and basic blending, then train with face charts and tutorials.